

Real estate photographers must make houses look spacious. This is one of the most important parts of any real estate photography business. However, this can be pretty tricky when you have a limited shooting area. This is why we’re sharing 5 tips for photographing small spaces so you can add depth and openness in tight spaces to help realtors sell properties faster.
To take photos of small spaces, you must use the right equipment, including a wide-angle lens and a tripod. Photographing tight spaces also depends on composition, so you need to change angles and shooting height to capture scenes completely. It also helps to declutter spaces and use natural lighting.
Now, let’s look into how you can combine shooting techniques and proper gear to take flattering photos, even in the smallest of spaces.
Use a Wide-Angle Lens
One of the best tips to remember when shooting in small spaces is to use a wide-angle lens on your Sony, Canon, or Nikon camera. The focal range of wide-angle lenses enables you to capture everything in a single frame, even when working in a cramped space.
The 24mm is the standard wide-angle focal length. This lens can exaggerate features due to perspective distortion, making smaller scenes appear larger yet interesting.
Meanwhile, ultra-wide-angle lenses are anything below 21mm. Depending on the situation, you can also use a 24-35mm wide-angle prime lens.
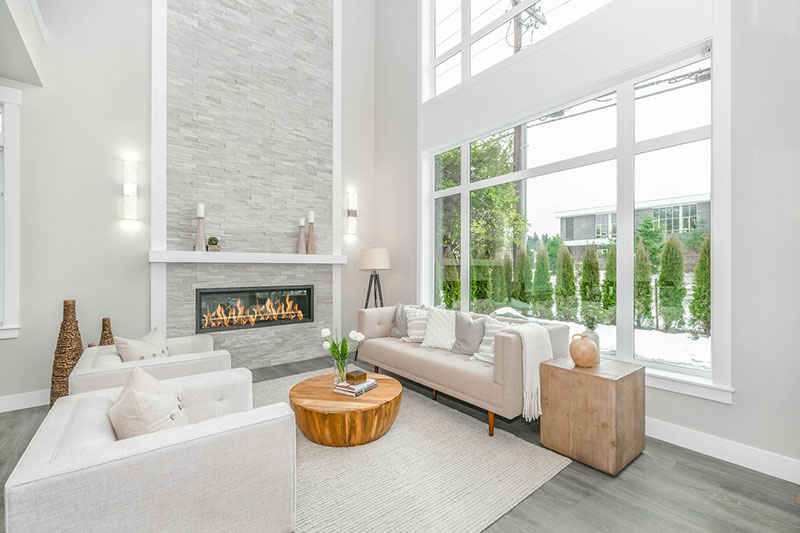
Declutter and Organize
Home staging is an essential part of real estate photography. The secret to home staging involves cleaning, reorganizing, and redecorating small spaces to make them look more open.
Remove unnecessary furniture, personal items, or any clutter that would prevent buyers from seeing a room’s features. You can still spruce up space by adding pops of color and centerpieces.
Compose Your Shots Strategically
The ability to compose shots creatively is a crucial skill for professional real estate photographers. However, it’s not all about what looks aesthetically pleasing or creative; it’s also considering how to make viewers imagine what it’s possibly like to stand in a given space.
- Use reflections: Some small rooms have mirrors, especially bathrooms. Mirrors reflect light, brightening the scene and enlarging the space in the process.
- Include negative space: Negative space leaves a breathing room to a viewer’s eye, making it look as if the room is less cluttered. Additionally, this makes people think as if there’s more space to roam around.
- Check your shooting height: Ideally, you need to position your camera at the right shooting height of about 4 to 5 feet.
- Shoot from the corners: Place yourself from the corners to help the wide-angle lens capture leading, diagonal lines, adding depth to the scene. You can also use doorways and windows to frame scenes.
Maximize Natural Lighting
Natural lighting is the key to making small spaces look more vast and welcoming. It removes yellowish hues on surfaces and unwanted shadows that would make tight spaces look even smaller.
Aside from choosing the best time to shoot a house, make sure to open curtains, blinds, or doors to let in as much natural light as possible.
Stabilize and Focus
About 32% of properties with high-quality photos sell faster. This depends on how well you stabilize a shot and apply focus evenly across the frame. Hence, it’s important to use the sweet spot or the ideal aperture of the lens to collect enough light to support autofocus.
It also helps to mount your camera on a tripod and use the timer. In this way, you can free up space and trigger the shutter remotely to ensure image stabilization.
Conclusion
Photographing small spaces involves careful planning of compositions, angles, and framing to create a spacious perspective. This requires using proper gear such as a wide-angle lens and tripod. You can also improve your real estate photos by staging the scene and modifying the light sources.