

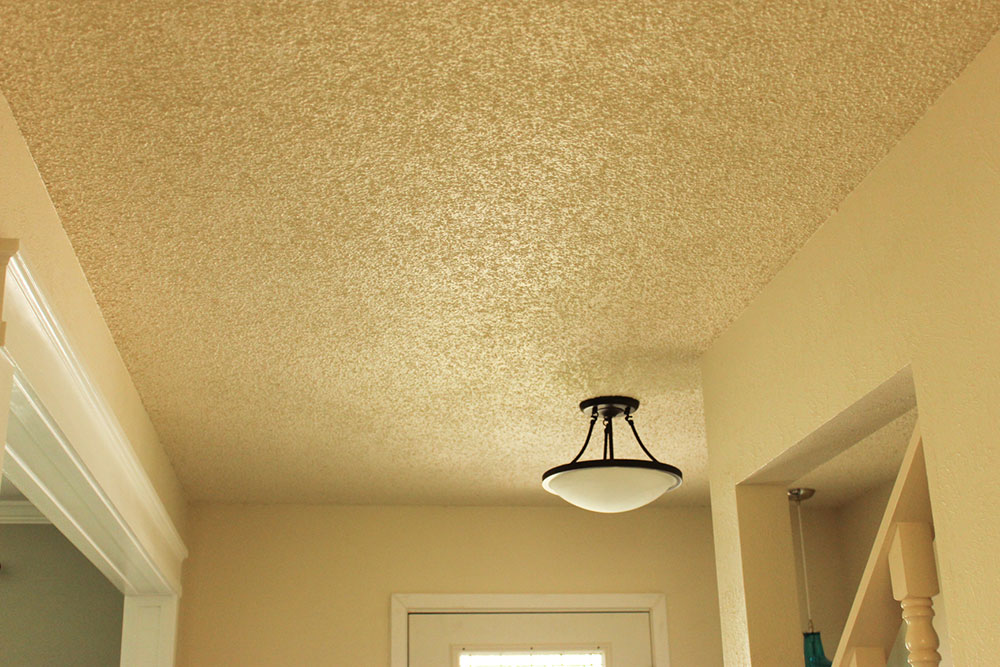
The popcorn effect is when an unbound mix of particulate materials is poured into paint and then applied to the surface with a sprayer. A popcorn ceiling, also known as acoustic, stipple, or stucco ceiling, was quite a popular alternative in the middle of the 20th century for troweling plaster. Builders used them those times because they were a result of cost-cutting techniques. With popcorn ceilings, they saved the cost of ceiling smoothing. Luckily, these ceilings turned out to be very popular, especially with buyers.
Builders used to spay the texture while ceilings were wet and, after they get dry, to cover the imperfections. It was standard for many places worldwide because of the bedroom and residential hallway ceilings for its white appearance, ability to hide imperfections, acoustic characteristics, and brightness. Compared with the living room and kitchen, the ceiling paint would be smoother with orange or trowel texture because they are easier to clean and have higher durability.
To paint a ceiling is not expensive, but you will think twice about painting a popcorn ceiling. A popcorn ceiling paint looks excellent if it is done with proper combinations of color in a typical way. Yet, if we know the right techniques to paint popcorn ceilings (textured ceilings) and prepare, it is pretty easy to do it yourself. It means that you can have whatever ceiling pain you want, paint popcorn ceilings however you want, and whenever you want.
Paints in popcorn ceilings

It doesn’t matter if you want textured ceilings or a drywall ceiling; there is a flat paint for an interior that can hide all the flaws and imperfections. Besides, to paint a popcorn ceiling, you need to plan to buy extra paint than you need and choose a proper paint made just for ceilings. The leftover paint you will use later for the texture additional surface area.
When choosing painting products, no matter if it is a paint sprayer or oil-based primer, the best painting products are the same for matte finish later or flat ceiling. To spend less time on this home project, you need to purchase high-quality products for painting. In this way, you will get better results. Plus, if you buy products that are pre-mixed with a primer, you will have significant benefits!
Also, you should be pretty aware when buying ceiling paint products because, for example, a latex or acrylic product can cause the stipple to peel because of weight. The first thing you should need to do is to thin up gradually by adding water to 20 percent to test the consistency.
Spray Painting
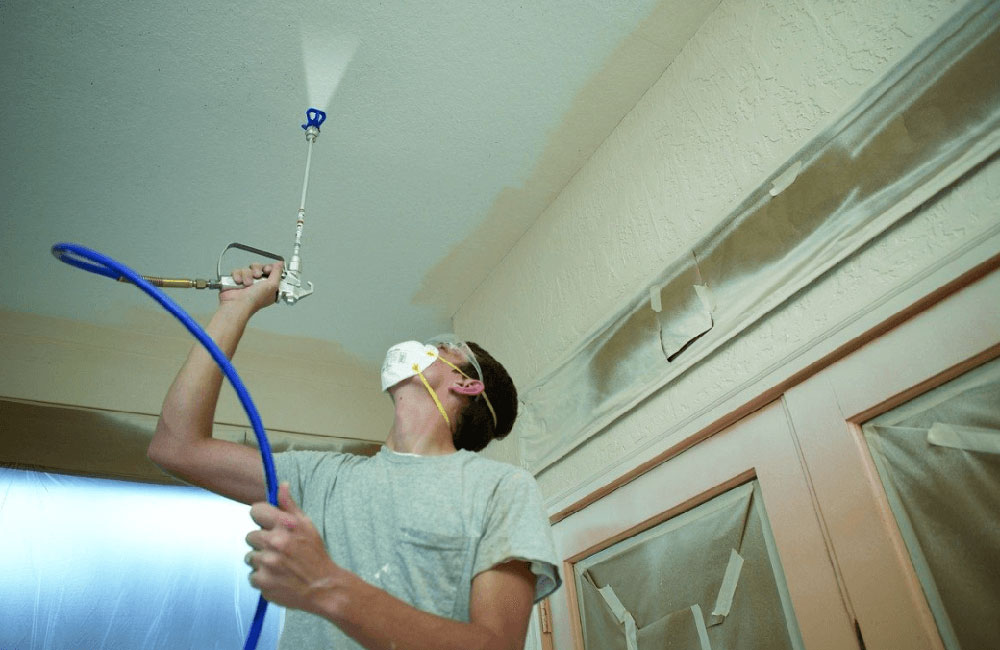

A paint sprayer is a marvelous thing, and the process itself it’s enjoyable. We provide you some paint spraying techniques that you can use to paint popcorn ceilings. First of all, you need to buy an airless sprayer designed especially for this type of ceiling paint. Usually, two thick paints are enough for great results.
Another thing that you should consider is the brand of the painting. Choosing a good-quality spray painting is crucial in spraying your popcorn ceilings. After buying a paint sprayer, you need to test it on cardboard or paper. Maintain the direction when you start spraying the first coat. The second spraying should be in the reverse direction. Consider taking a break of one hour or two between spraying because the stuff needs to be dry.
Painting by Rolling


Those who want to do more intensive work, rolling for painting the popcorn textured ceiling, are the perfect method. This process can be pretty messy, so use some protective clothes. There will be a lot of dripping, so we recommend you wear safety glasses and headgear. With all this clothing, you can protect yourself from splashing and paint your ceiling peacefully.
Keep in mind buying a wool roller cover by lamb or, for the roller, some synthetic covers. Use a roller setup and a bucket to do the work properly. There is one problem-the ceiling’s edges. For them, you will need to use a different paintbrush. While rolling, it is crucial not to make pressure. It requires painting from three to four times if you want a significant effect.
Sand and Prime Paneling for a Light Color Paint

Good priming and sanding can cover imperfections and make sure if the paint’s adhesion is excellent. Oil-based blocking primers or alcohol is perfect for paneling. Why? Because they hold firmly to the surface and are durable. The paneling process includes plywood and solid wood, so it is good to use good quality brushes to get the desired results.
Ideas
Tree Tops


Palm trees ceiling techniques are another great way of painting. Its effect is quite good with a mural wall and a tropical scene of tall palm trees near the ceiling. It will be more effective in appearance and looks. The first thing you should do is paint the entire ceiling perimeter with palm fronds to create a sensation of being in a tropical grove. Or add actual palm fronds nearby the ceiling corners for dimension, the touch of realism, and texture.
Twilight Sky

Twilight Sky is one of the most iconic moments painted on your ceiling. A walk along a tropical beach together with the sky look – before and after the sunset. The rich tones on the painted ceiling are after the sun sink. You have a sensation that you are on an exotic seaside vacation. Plus, adding tropical birds and seagulls silhouettes in flight on the ceiling sky will add an extra exotic feeling.
With the brush flicking technique, a ceiling paint – glow in the dark will create wonderful stars for viewing at night. This ceiling paint you cannot consider during the day adds a new and fantastic dimension once you turn off the lights.
Resurface or Paint a Blown Ceiling

This type of paint ceiling is also called a popcorn ceiling. It is a ceiling treatment that is acoustic and includes paint or spray to create a look with texture. Textured ceilings are pretty good in hiding imperfections, but it appears dirty and tends to trap dirt. First of all, you need to apply to the ceiling an oil-based primer using the best paint roller cover.
On the other hand, you can use the primer and spray it onto the ceiling. It would be best if you let the primer dries for four hours. Make sure you paint every ceiling-stained area. Let it dry entirely before you paint all the rest.
Resurfacing
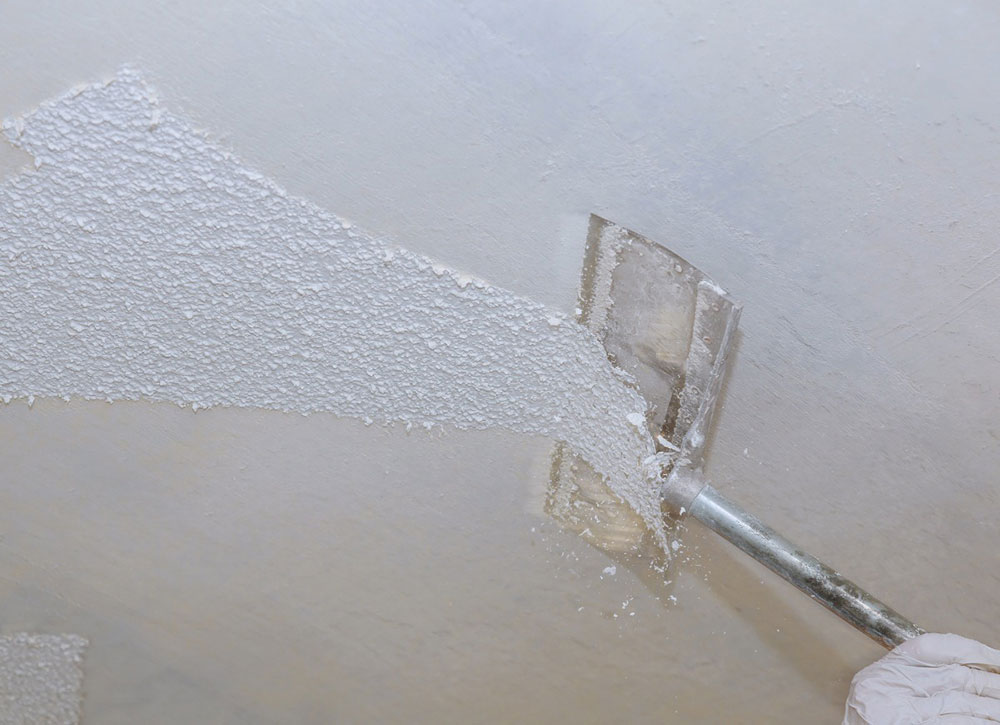
Firstly, you need to make a mixture of 1 water gallon with three tablespoons of dish-washing soap. Then put the mixture in a spray bottle or a sprayer. Finally, you need to apply this on the ceiling section about 4 feet square. Make sure it is wet enough to cause loosen ceiling texture. Yet, too much wet can damage the underneath the drywall.
Another thing to do is cover visible nails with drywall filler to suit the drywall surface. You can sand the ceiling using grid sandpaper. It is needed, you can apply a compound joint layer over the tape. Make sure the joint compound dries entirely and sand it.
Tips
Preparation for Painting

Painting popcorn texture ceiling includes splatters experience and huge splashes. There will be paint everywhere down, and the first thing you should do is remove furniture as much as you can. Another thing to do is cover furniture with a cloth or plastic sheeting if you cannot remove it. To prevent floor scrubbing, spread the floor sheets. Plus, if you want to avoid fixtures getting painted, pack them carefully or remove them.
Another important thing before you start to paint is to clean the popcorn texture ceiling. Yes, avoid cleaning it harshly because you can harm the texture. You can also use a feather duster for cleaning it.
Consider the source of stains
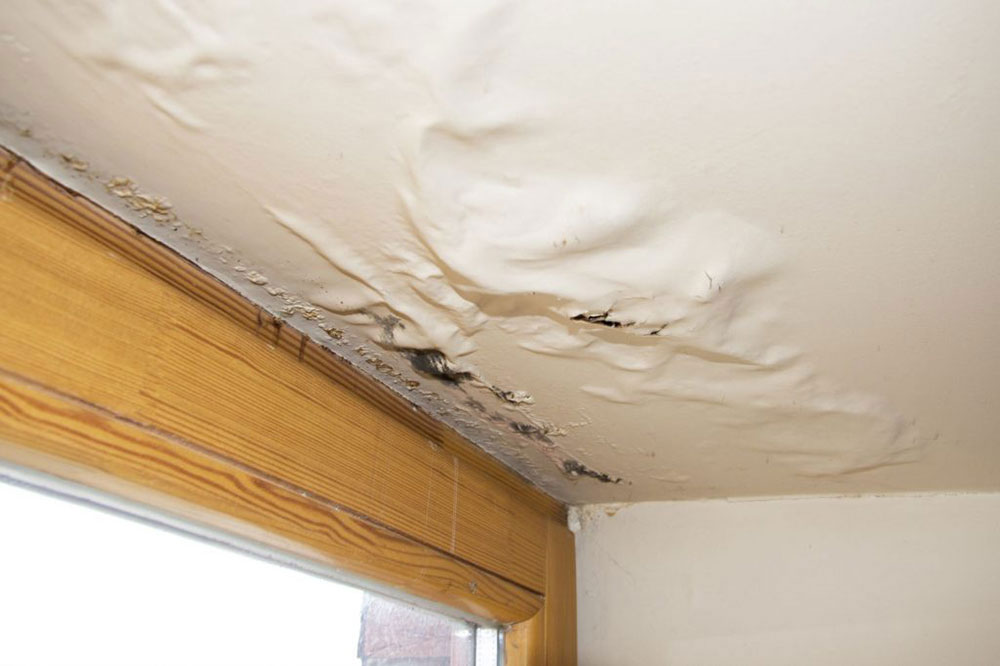

Take care of every popcorn ceiling in the house! If you see any stain from a paint, react immediately to avoid damage of costly damage. It may look unnecessary, but this tip is essential. Try not to forget to do it.
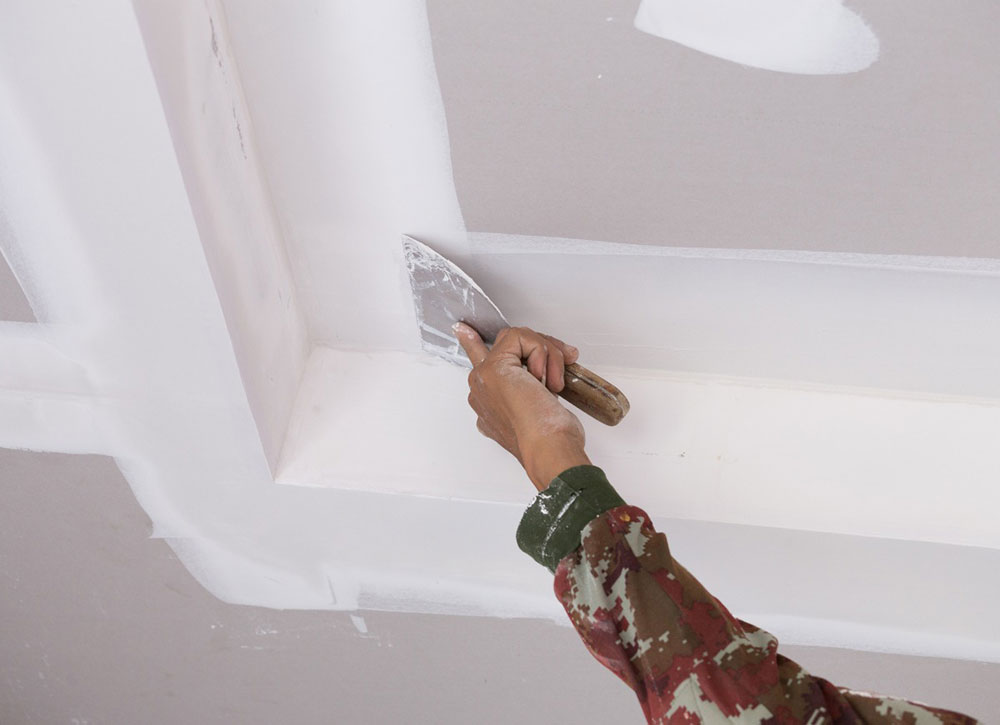
Cut in the popcorn ceiling edge.
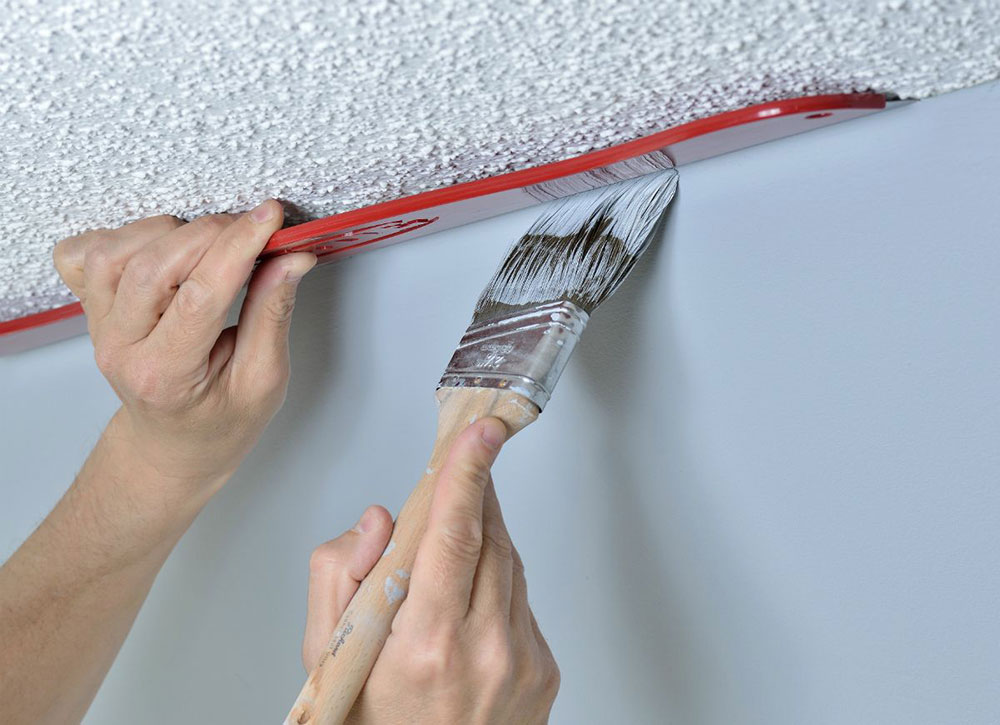
First of all, you need to load the brush with fine paint. Then it is recommended to apply the first coat with a light touch and try not to overwork the area. Consider not to get the popcorn ceiling too wet because of peeling off. You should pass the ceiling one more time after it dries.
What is the Best Primer?
The best primer to use is the oil-based one. It is good to use this kind of primer for textured acoustic material because water can soak into it, pull it away, and weigh on it. After the oil-based paint is dried, you can now use color based on water. To seal the heavy paint stains, use a variety that is stain-blocking. In that way, you will keep them from bleeding through the new color.
What will a fresh coat do to your popcorn ceiling?
A new fresh coat will give a brighter and lighter look to your room. This DIY process is quite challenging, and to paint a popcorn ceiling, you will need the best paint tools and a lot of techniques. If you want to do the painting of a ceiling, then you should be prepared for every detail that the process includes.
If you enjoyed reading this article on what kind of paint do you use on a popcorn ceiling, you should read these as well: