Advertisement
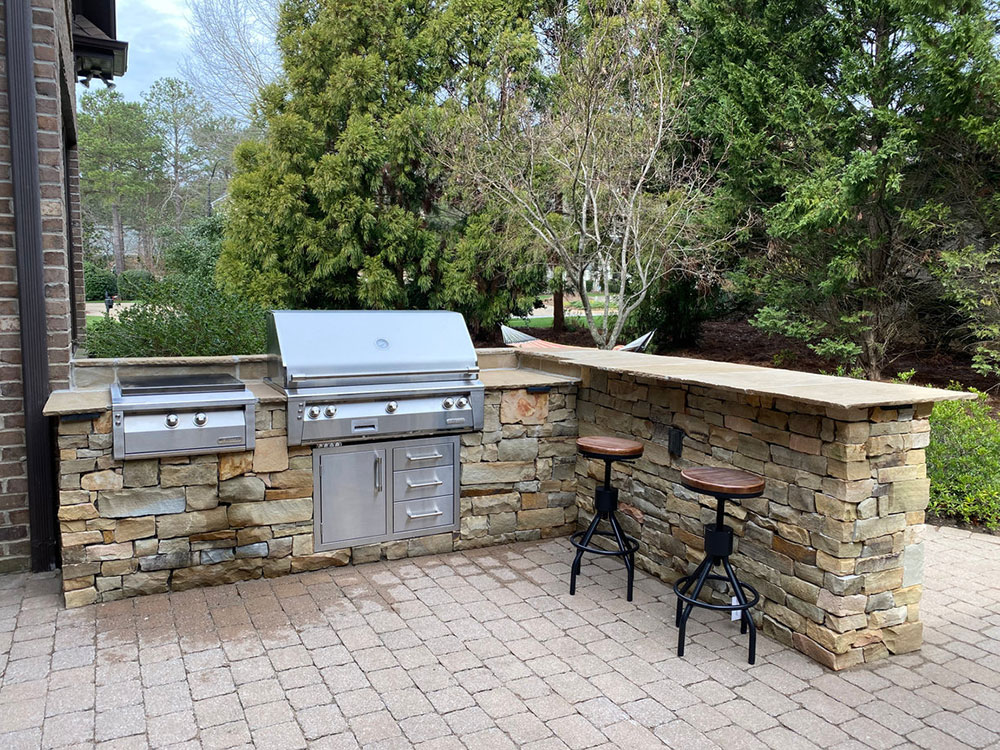
Outdoor living space may not be your first idea when looking for a new home, but doesn’t it sound awesome? What homeowners especially love is a large garden where they can grill barbeques and entertain guests. So why not build an amazing outdoor kitchen?
The best thing about an outdoor kitchen is flexibility. If you have more room on your patio, you can custom-build an outdoor kitchen in all shapes, sizes, or designs. You are also not limited to which materials you can use, and you don’t have to worry about ventilation installations.
Best of all, an outdoor kitchen is easy to plan and requires only little technical knowledge. You can build your food preparation nook with inexpensive materials such as plywood panels and paver blocks.
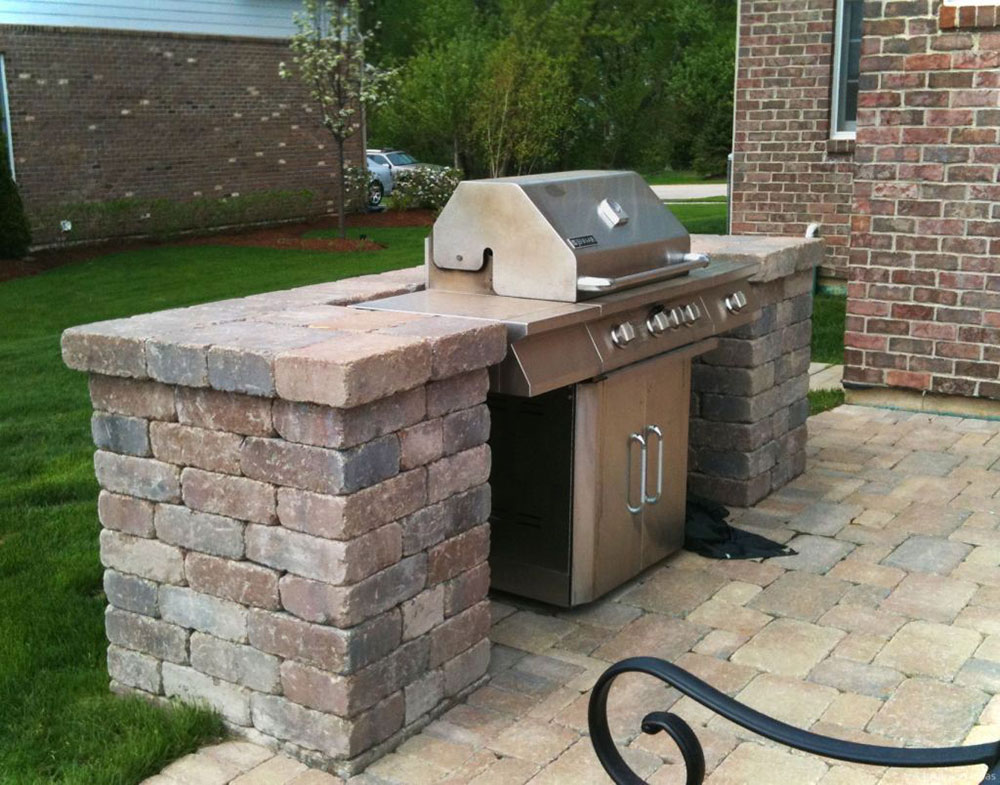
Step-by-step guide on how to build an outdoor kitchen with pavers
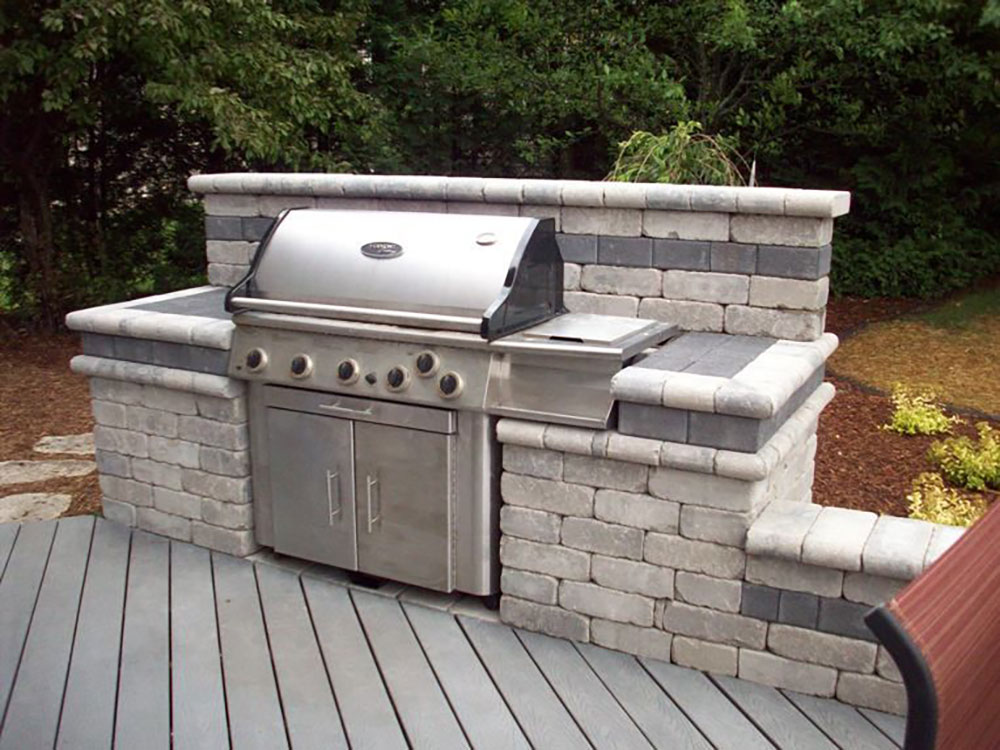
Why are outdoor kitchens so awesome? Homeowners with gardens or a patio love a functional outdoor kitchen for food prep and entertainment. All it takes is to define the area where they can cook and entertain guests, and plan which appliances they need.
There is a variety of materials that would look nice in an outdoor kitchen setting. These materials should not only look nice but also be durable and able to resist exposure to weather damage. Examples would include stone veneer, concrete, or stainless steel roofing nails.
Which appliances are necessary for outdoor kitchens? Next to the centerpiece grill, you will also need to install a smoker, oven, stovetop, countertops, and a refrigerator to store food. The same as in a regular kitchen, bring in enough cabinets for storage and a trash bin to make cleaning easier. You can also get creative and build your artisan pizza oven. Your friends will simply love spending time in your new outdoor kitchen!
To get inspired, research outdoor kitchens online and decide what you need. We will also assist you with our step-by-step guide on how to build an outdoor kitchen with pavers.
Plan your outdoor kitchen carefully
Careful planning will help you make optimal use of the property’s layout. For starters, choose the most appropriate location, and keep in mind you may also need some dining area to invite guests over. Mark the area for prospective wall panels with tape or with chalk.
Take some time, and draw your own outdoor kitchen. Select a place for each piece of furniture or appliance, and you will get an idea of how big the room should be. Think of it as a regular kitchen. Divide it into areas dedicated to various cooking activities, and make sure there is enough storage space in the outdoor kitchen. Once the area is framed and all items are placed, you will need to attach the paver blocks to the frame. This way, the outdoor kitchen will have an exterior that simulates a bricklayer.
Last but not least, don’t forget to plan a working sink. If you are not sure how much space you need, measure using the paper template that came with it. Cut off a piece of rigid foam insulation to ensure the sink void is accurate.
Frame up your outdoor kitchen
In essence, what you are building here is a wood frame and you must create and leave openings where necessary. You will need these openings to accommodate your grill, countertop, and sink. At the same time, you should also ensure movement is not an issue, and that you have enough space for cabinet doors to open without fuss.
The first step is to cut eight 2 x 4 pieces to the planned counter height. You can then use these as the corner posts for the wooden boxes. The easiest way to do this is to use a circular saw. Next, subtract the metal post standoff height and the countertop thickness, so that you come up with the exact measures.
When the pieces are ready, screw them together with a drill and 2 1/2-inch deck screws. There should be a 2 ½ inches high and a 1 ½ inch deep notch at the bottom of each part. You can create these with the circular saw too.
To divide the cut posts, cut four 2 x 4 pieces as deep as the box. Line the four posts up and screw them together on the bottom and the top. This way, the sides will be permanently connected.
Moving on, cut four more 2 x 4 pieces to the box’s width. These pieces should run at the bottom and the top of the box’s back and front.
The final step is placing a 2 x 4 in the center of the frame for some extra support. You can also apply a wiring layer to the frame of the box to create a stable base for the pavers.
Install the paver brick surface
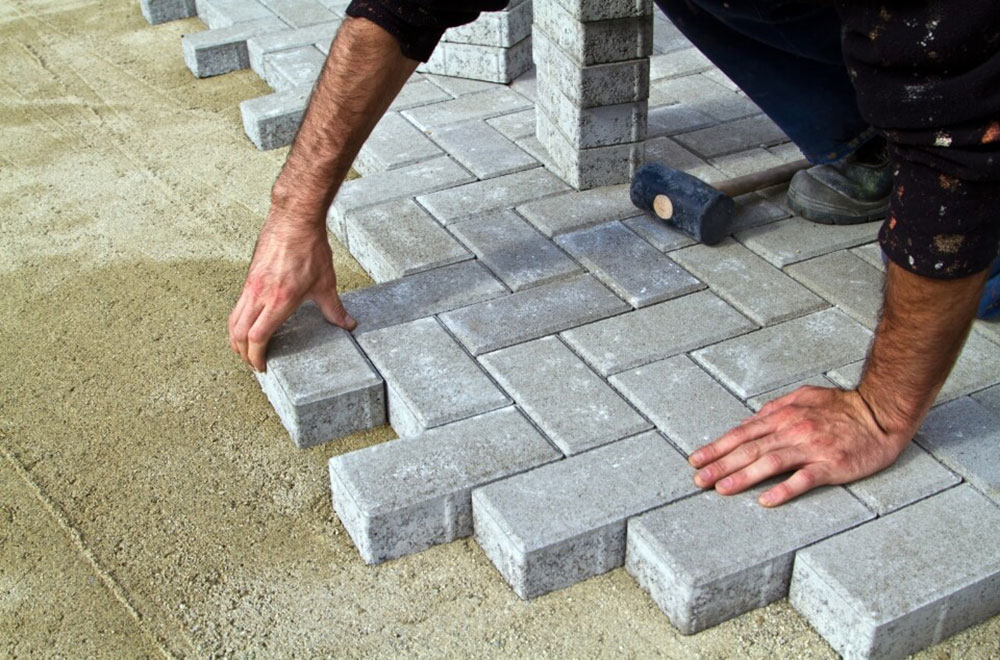
The first patio challenge you will face is that the bricklayer is slopped. The reason for this is to let the rain run off and to protect the patio from water damage. You will need to level the bottom stones, ideally by applying mortar for the bottom framing.
Start with the corner stones, and use a 6-foot or 8-foot long level to check if the stone tops are in line. As soon as the mortar hardens, repeat the process on all bottom stones until you’ve reached the desired height.
The long level will also help you preserve the rows plumb so that they don’t bow outward or inward in the future. This is a very simple process and all you would need to do is to run a string line starting at the outside of the corner stone, all the way to its end. The string will be another safeguard that ensures the courses are even, so make sure you repeat the process on each course.
Once you’ve ‘buttered’ the backside of each block with mortar, begin laying each piece into position and let it dry. Give yourself some extra time, as the layer must be completely dry before you cover it with the next one. Don’t forget to smoothen the mortar in the joints with the appropriate tool before it dries out. This way, you will have both a stable and a nice-looking outdoor kitchen.
Most importantly, wear gloves throughout the entire process.
Take care of the countertop space
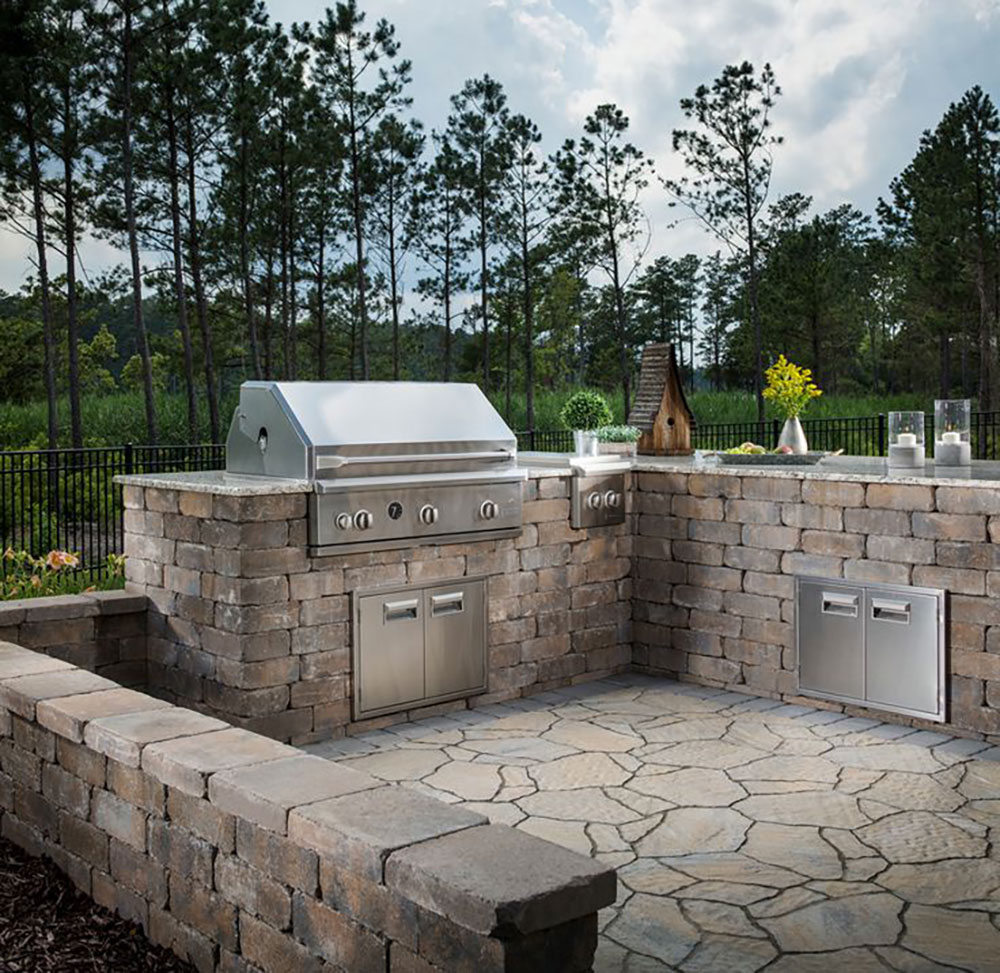
Once you’ve settled on the height, you can finish your project by applying the countertop. You can choose from a variety of countertop materials, but make sure you pick one that is durable and fits your design idea. We would recommend concrete block, due to its excellent quality. Better yet, a concrete countertop looks natural and sturdy, and you can cut it in any dimensions you want.
One of the biggest upsides of an outdoor kitchen is that you can choose any countertop space you want. Depending on how many cabinet boxes you need, it can become your key corner piece that attracts immediate attention. This way, your custom outdoor kitchen will have a unique centerpiece and food prep will be a delight.
Once you’ve applied the concrete countertop, level it to the right height. If you need to adjust it, use shims. you should also secure it in place using construction adhesive. It is that simple! Bring in your grill and try it out!
But how can you build your concrete countertop? While this does sound like a job for a professional, the inverse-pour method can simplify it significantly. This is how we would do it:
As usual, pick the location first. Make all necessary considerations, such as the size of appliances that come over it, or its weight. Odds are great you won’t be able to pour concrete in the kitchen itself, and you will need to pick up the concrete block and move it to its destination.
You can complete the process with an additional melamine layer to preserve the exact counter dimension. remember to do so in an inverse way (left is right and the top is bottom). This way, you make sure you will have the exact dimensions you need.
The pouring process creates holes inside the melamine and your concrete countertop. You can seal these easily with silicone caulk. You will also need to clean the melamine very carefully: it will be applied on top of your concrete counter and you want it to look smooth and marvelous.
Finally, pour and mix the concrete. Time means everything in this process, and you will be surprised how fast rapid concrete dries. To make things a bit easier, you can add flow control to each bag, as well as a bottle of concrete colorant to achieve the desired nuance. Since rapid-set concrete comes in small bags, you can mix it easily with everyday kitchen appliances.
At the very end of the process, cover the new concrete countertop with fiberglass rebar. Remember to pound the rebar gently throughout the entire form using a mallet. The bubbles will then be released, and you will have a smooth surface to work on.
Don’t forget to occasionally spray the concrete blocks with water while they are curing.
Other things to consider when building outdoor kitchens
Proper ventilation
When thinking of outdoor kitchens, ventilation is not the first thing that comes to our minds. And yet, the feature is just as important here as it is in any regular kitchen, perhaps even more due to the gas grill we are planning to install. Outdoor ventilation won’t be enough.
Another important purpose of an installed ventilation system is to reduce food odor and make your guests feel more welcome. It will help you protect your kitchen from grease, smoke, or any unpleasant fume.
As we advised, pay special attention to ventilation if your kitchen if you are using natural gas lines or propane tanks. Outdoor cooking with these can be extremely dangerous if the kitchen is not properly ventilated.
Optimized grill area
The choice of a grill is probably the most important decision you will make in the outdoor kitchen. As an example, you will need to install propane tanks for propane grills or push gas lines though to provide access to your gas grill.
The same considerations need to be done for electrical appliances in outdoor kitchens. There must be enough outlets in place, properly secured from water damage. You can even add extra ones to charge your phones.
Enough storage space
You will need designated storage areas in your outdoor kitchen, perhaps even more than in the regular one. Pick the appropriate places for your cooking items, pans, pots, utensils, and even accessories. The kitchen will then look clean and well organized.
Functional lighting
Outdoor kitchens need to remain functional any time of the day, so take care of lighting installments as well. There are, of course, the usual overhead lights, but you can consider other fixtures as well. We suggest pergola lights, flooring lights, or even wall scones in secluded and private areas.
Ready for some outdoor cooking? We hope our tips on how to build an outdoor kitchen with pavers were helpful.
If you enjoyed reading this article about how to build an outdoor kitchen with pavers, we also wrote about subjects like how to style glass kitchen cabinets, why are kitchen cabinets so expensive, how to vent a kitchen sink under a window, and how to calculate linear feet for kitchen cabinets.
That is not all. We have other kitchen related articles on how to remove rust from kitchen utensils, how to fix a gurgling kitchen sink, how to pack kitchen appliances, how to clean gunk out of kitchen sink drain, how to disguise kitchen soffits, and how to cover kitchen cabinets without painting.