Advertisement
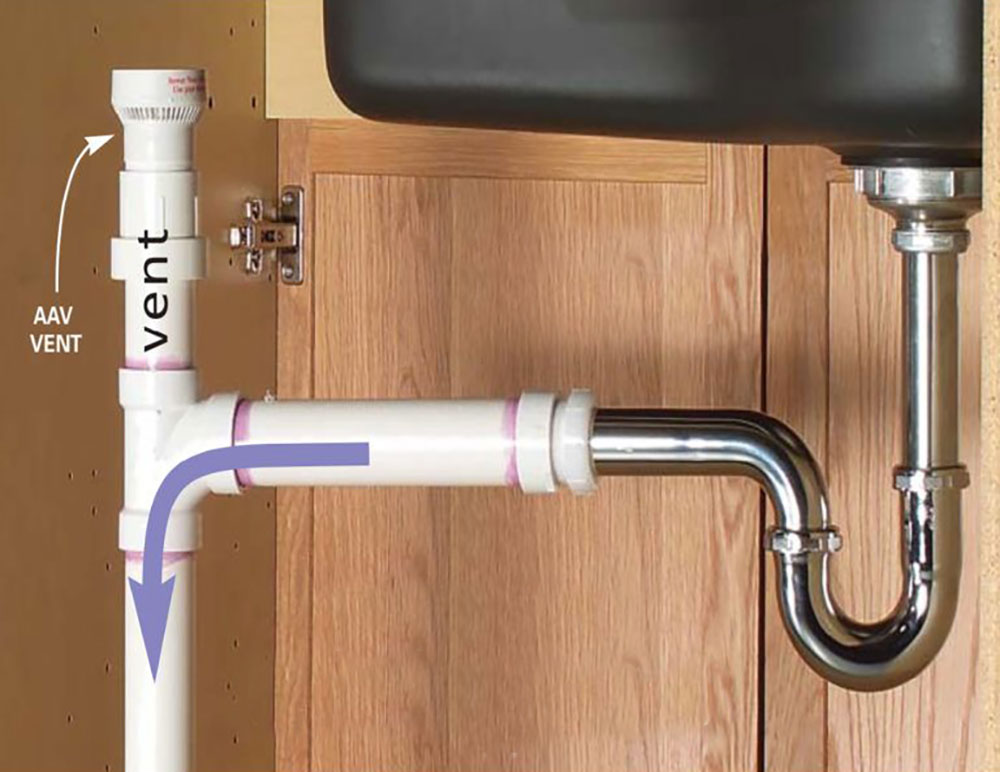
According to the plumbing code, each plumbing fixture in your home must have proper venting. This prevents the pipes from clogging and keeps us healthy at the same time. If there are no vents, negative pressure builds up in the pipes until it empties the P-trap and lets sewer gas run directly in the kitchen.
There is usually a vent on each fixture that joins a main venting system on the roof. If the vent is built under a window, however, the process is more complicated. And yet, we would all love a sink with a beautiful outdoor view while we are doing the dishes.
Most homeowners don’t have the necessary skills to complete a task like this. To make it easier, we compiled a list of guidelines on how to vent a kitchen sink under a window. Follow the steps, and you won’t need to involve a professional plumber in the task.
How to vent a kitchen sink under a window
We spend a lot of time in our kitchen. As a result, different types of food and beverage smells assemble and make ventilation essential at all possible levels.
If you don’t vent a kitchen sink, for instance, water will flow slowly and there will always be an unpleasant odor spreading through the room. Most of the time, this means there is waste and food residue in the drain pipes that need to be removed immediately.
Learning how to vent a kitchen sink under a window sounds complicated, but that shouldn’t discourage you from doing it yourself. All you need are some basic measurements, basic skills and familiarity with the main vent shaft, and, of course – some drilling.
Follow our guidelines and suggestions, and you will see how easy this process is. Let us tell you which items you will need.
Assemble the proper tools

These are the materials you need to begin the process:
- Tape measure
- Chalk line or a pencil
- Level
Begin by drilling with 1 5/8’ths Forstner bit. You can also use a paddle or a spade, but make sure they come in identical sizes. Our recommendation is to use a paddle, as it is much easier to drill with a hand-held tool and you can make very precise holes.
Other than that, you will need:
- A drill bit, a hammer, and a Phillips’s screwdriver to remove the baseboard
- 1 ½’ PVC or ABS plastic pipes (try to use the very same pipes you already have at home)
- 2’x2’ and 1’ x ½’ PVC or ABS sanitary tee
- ABS or PVC long sweep pipe elbows (1’ x ½’)
- ABS or PVC connectors
- ABS or PVC pipe cement that matches the old and the new pipes
- Nails, cords, and chalk line
- Y-connectors for PVC and ABS
Step 1: Get prepared
First of all, drain and clean the kitchen sink and make some space for the plumbing activity. Secure smooth and effortless access to the cabinet under the kitchen sink and the plumbing fixtures.
You should be able to find a shutoff valve behind the kitchen sink which you can use to make sure water won’t overflow from the sink while you are working.
Step 2: Install the sanitary tee
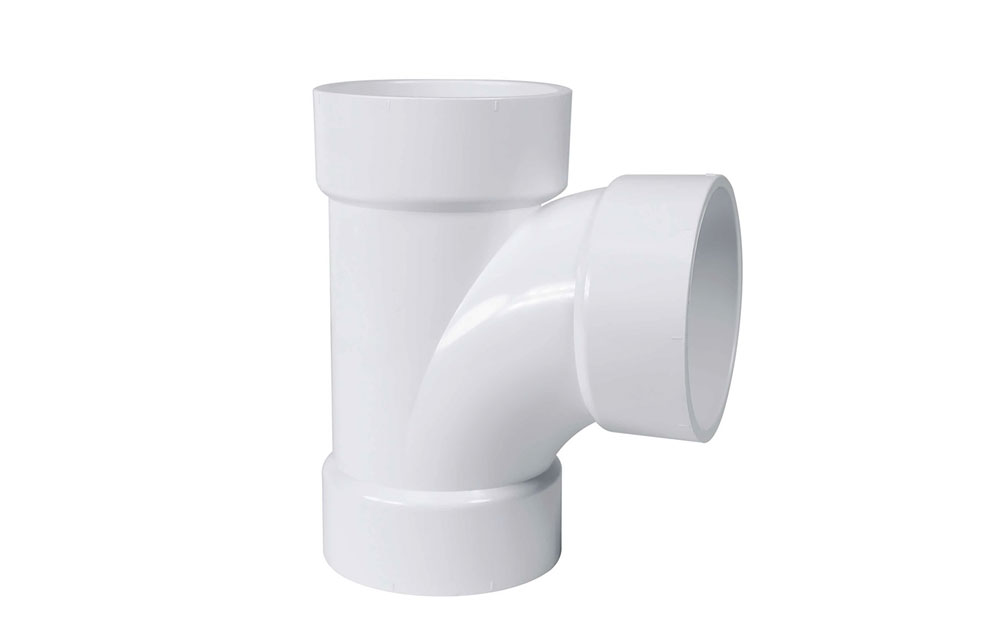
The sanitary tee should be installed directly in the drain line of your kitchen sink. This means that you’ll need to work your way up to the wall cavity and do the installation there, so make sure that the sink is dry. For waistlines not longer than two inches, use a 2 x 2 PVC sanitary tee.
Place the sanitary tee inside the wall cavity and along the drain line. It should not lay further than 3 1/2 feet from the P-trap’s bottom. You can use PVC cement to glue it directly to the kitchen sink pipe, but make sure you glue it to its other side. The 1 1/2 inch port should be facing upward.
You can orient the tee any way you want, depending on where you want to install the vent pipes. An idea would be to install them where the waste line starts dropping vertically, and to glue a parallel port to the line. Next, make sure the sweep is angled away from the drain and that it faces the perpendicular port upwards.
Step 3: Connect the kitchen sink and the waste drain pipe
You can also connect the horizontal kitchen sink drain pipe to the toilet waste drain pipes. To do this, you will need PVC sanitary T-fitting at 2-by-2-by-1.5-inch. You can locate the connection easily – it must be in the stud space behind the kitchen sink.
These fittings usually come with three openings. What you need to locate is the 2-inch opening on the side that is attached to the kitchen sink pipe. It should be facing downwards, the same as the other 2-inch openings.
You will see a 1.5-inch gap. To install the fittings and the PVC pipes, follow the instructions on the PVC adhesive and PVC primer containers.
Step 4: Configure the vent pipe
One of the most important decisions you will have to make is the pipe configuration. Keep in mind that the horizontal vent pipe must extend through the wall studs enough to enter the stud space where you can reascend it vertically. But before that, it must extend upwards to join the sanitary T-fitting, and this may be your biggest challenge.
Make things a bit easier for you, and draw a line beyond the window with chalk or a pencil. This way, you can mark the exact spot where the vent pipe should turn upward, ideally with a slipe of 1/4 inches per foot.
Step 5: Drill the holes
Drill a hole in the stud area, at the exact spots you marked with a chalk line. Make sure you are drilling the holes in a load-bearing beam so that the integrity of the kitchen walls is not compromised.
The stud in most kitchens is between 16 and 24 inches long. You can locate it easily with a stud finder, or by simply tapping on the wall. The drill bit you are using should have a 1.75 inches diameter.
Step 6: Connect the pipes with the holes
To be able to connect the PVC pipe with the hole, take a pipe saw and cut 1 1/2 inches piece on its end. This will make it easier to attach the top opening to the hole. You can then fasten the sanitary T-fitting with PVC adhesive or PVC primer.
The vent pipe should run horizontally or rise a bit at the angle, so don’t let it slope downward.
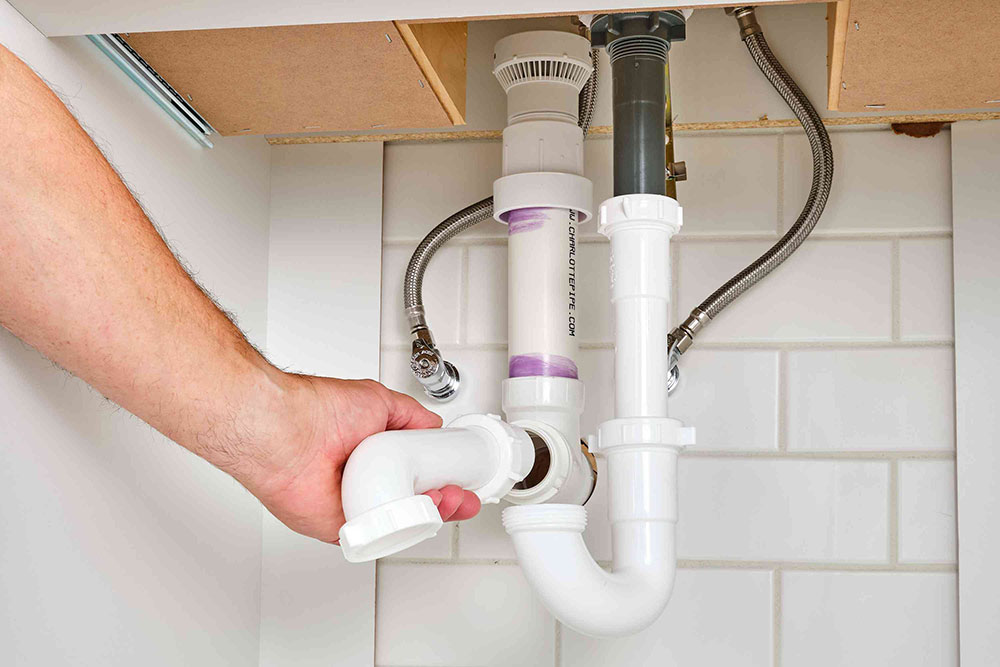
Step 7: Install the PVC Vent Pipe
To install the straight-up PVC vent pipe to the attic, drill a hole through the ceiling plates. Go to the attic and connect the pipe with an additional PVC elbow. From there, the vent pipe should run only horizontally, until it reaches the soil stacks and the central vents.
Step 8: Join the stack and the pipe vents
Once you decided on the location, get some PVC cement and attach the vent stack to the sanitary tee. You can connect the vent stack and the vent pipe with an additional horizontal pipe.
Your ventilation system should be up and running at this point. To test the vent pipe, let the water run in the kitchen sink and inspect the pipes to see if they are all functional. The hardest part of implementing your vent pipe system is now behind you, and there are only a couple of things to keep in mind.
When you are enabling a new vent system in the attic, make sure there is at least a 1/4 inch slop for every foot.
When it comes to a new vent pipe system, materials matter a lot. Take a look at the central vent at home. If there are ABS pipes instead of a PVC pipe, install a similar venting system and connect the pipes with the appropriate ABS glue.
When learning how to vent a kitchen sink under a window, you will have more questions than answers. Let us answer some of them and help you build your sink vent like a pro.
Why should the kitchen sink vent be placed under the window?
Location is not that important, at least not as much as proper sink ventilation. Many homeowners decide to place sinks under their outside windows, because of the following reasons:
Direct sunlight
You will always have enough light to wash up in the early morning and you will save power during the day. At the same time, you will have a very nice view and enjoy even washing the dishes.
Wind and breeze
Windows are the best areas in the kitchen to make use of nature’s power. You will keep the kitchen fresh and be able to smell your nice garden while doing the chores.
This also eliminates the odor of smelly dishes or sewer gases from clogged sinks. Open the window shortly, and all unpleasant smells will be gone.
Take care of your kids while washing the dishes
It is even better if the window oversees the yard tr the garden, as you will be able to keep an eye on your children while they are playing.
Aesthetics
Kitchens are designed foremost with practicality in mind. As a result, there aren’t that many focal points that attract interest. A vintage sink under a sunbathed window will easily become the highlight of your kitchen, and you will enjoy spending more time there.
Lower cost of installation
By installing the central vent below a window, you enable hot and cold water to flow in a single line and around a single wall. This way, the installation process is both cost-efficient and quick. This applies also when you are installing the sewer line.
Efficient storage
You can’t place that many items under a window, so why not use this space for a kitchen sink. As a result, you will have the space to bring in an extra cabinet and store some additional items inside.
Final thoughts on how to vent a kitchen sink under a window
The kitchen sink is one of the most important items in every kitchen. The central vent system, therefore, plays a very important role in that kitchen. It prevents clogs and ensures no sewer gases harm you and your family. Installing a functional venting system on your own is challenging, but not impossible. Follow our tips on how to vent a kitchen sink under a window, and you can get the job done without plumbing skills.
A safe sink vent also means a safe main vent, as no gases can spread around the entire house. Instead, they move towards the roof and leave the house permanently, and you don’t have to deal with health hazards and unpleasant smells.
If you enjoyed reading this article about how to vent a kitchen sink under a window, we also wrote about subjects like how to style glass kitchen cabinets, why are kitchen cabinets so expensive, how to build an outdoor kitchen with pavers, and how to calculate linear feet for kitchen cabinets.
That is not all. We have other kitchen-related articles on how to remove rust from kitchen utensils, how to fix a gurgling kitchen sink, where to put a microwave in a tiny kitchen, how to pack kitchen appliances, how to clean the gunk out of kitchen sink drain, and how to cover kitchen cabinets without painting.