

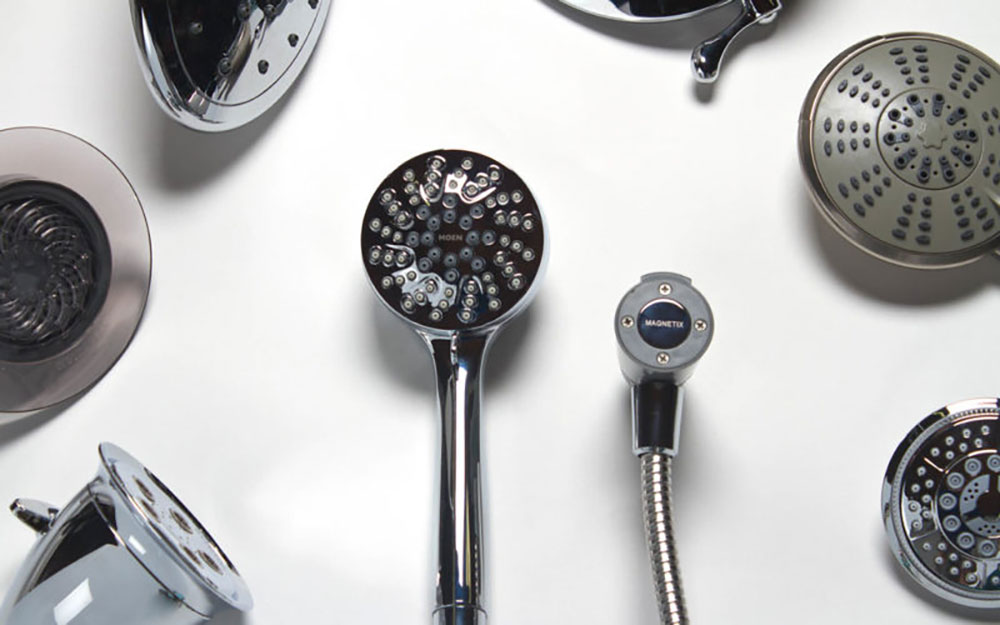
When the water flow from your kitchen pull-down faucet is reduced, a clog in the spray head might very likely be the cause. This is often the result of calcium deposits. Additionally, kitchen faucets are a breeding ground for mold, mildew, and lime buildup and should be cleaned at least twice a month.
We’re going to demonstrate an incredibly simple method for cleaning a kitchen faucet so you can feel good about the water you use on a regular basis.
Want to learn how to clean the kitchen faucet head with ease? Keep reading this article and you’ll find many useful advices.

Materials
When considering how to clean the kitchen faucet head , one of the first steps is to determine if you want to concentrate on watermarks, limescale, corrosion, or general cleanliness. Depending on your objective, method of how to clean the kitchen faucet head will differ and you’ll want to choose various items.
For example, you’d use a toothbrush to clean the nozzle and remove stubborn stains, but this isn’t essential for a fast clean. Conduct a general clean and then choose extra items for targeted areas, such as limescale.
How to Clean a Kitchen Faucet Head with Vinegar
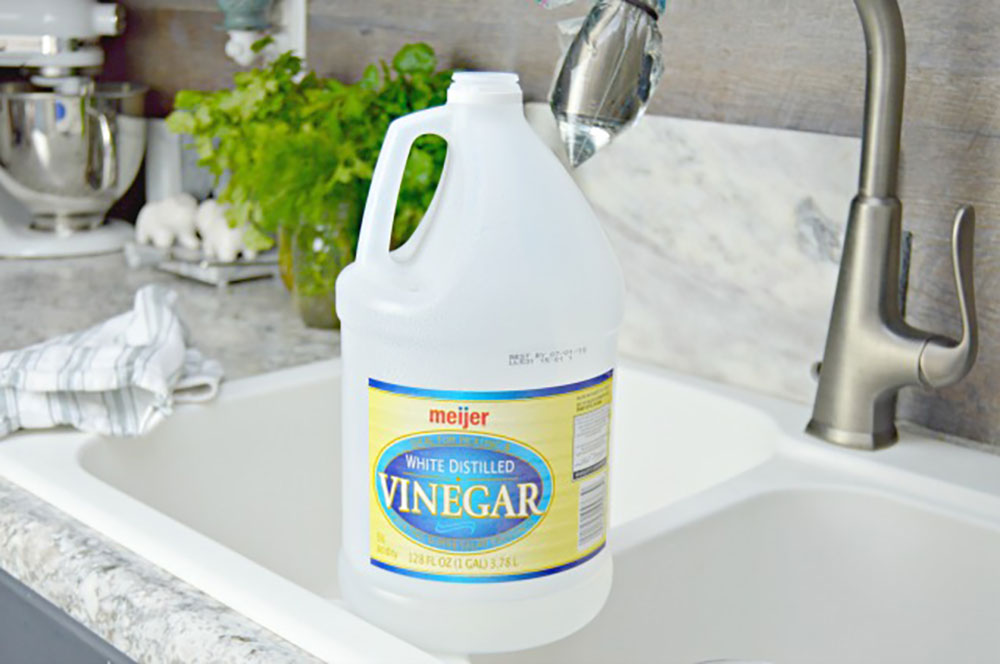

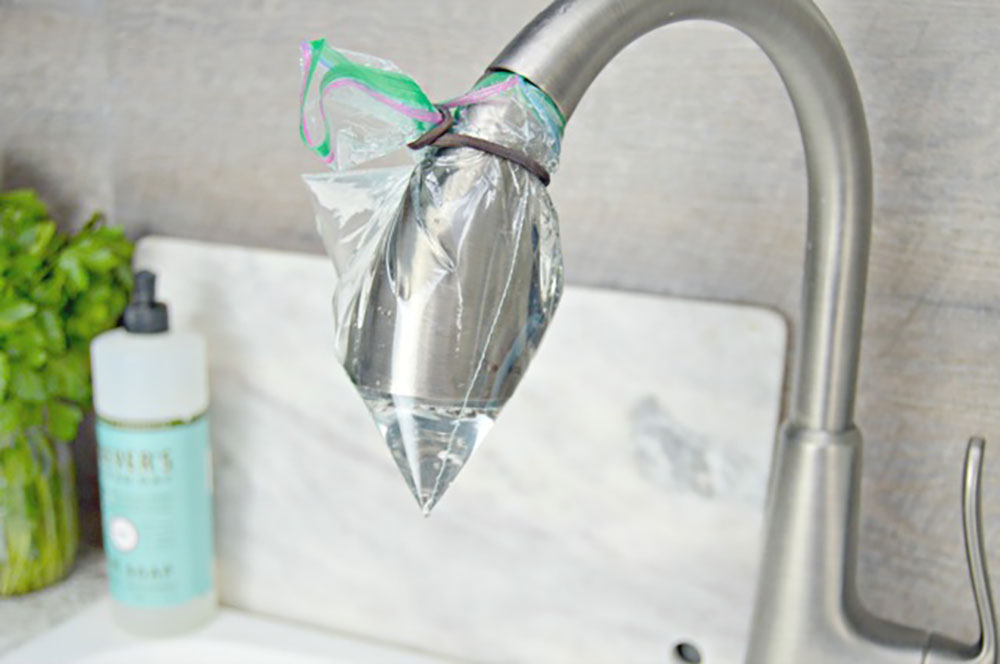
If you’re unfamiliar with the vinegar baggie tip for cleaning a kitchen faucet, now is the time to get acquainted. Essentially, this is a hands-free method for thoroughly cleaning your faucet, and any white vinegar will suffice. Vinegar is an excellent disinfectant and will assist in the elimination of germs and bacteria.
- Simply fill a zipped plastic sandwich bag halfway with diluted vinegar and twist tie it around your kitchen faucet overnight to disinfect it as well.
- Simply fill a bag halfway with water and half with white vinegar, immerse your kitchen faucet, fasten with a rubber band or zip tie, and leave for 20-30 minutes.
- Discard the baggie. Remove any remaining debris from the entire spray head with a dish brush and rinse with warm water.
By tomorrow morning, your kitchen faucet should be clean and functioning normally. Simply remember to run the water for about a minute after removing the bag to flush away any remaining vinegar or buildup.
Using Baking Soda to Clean a Faucet Head
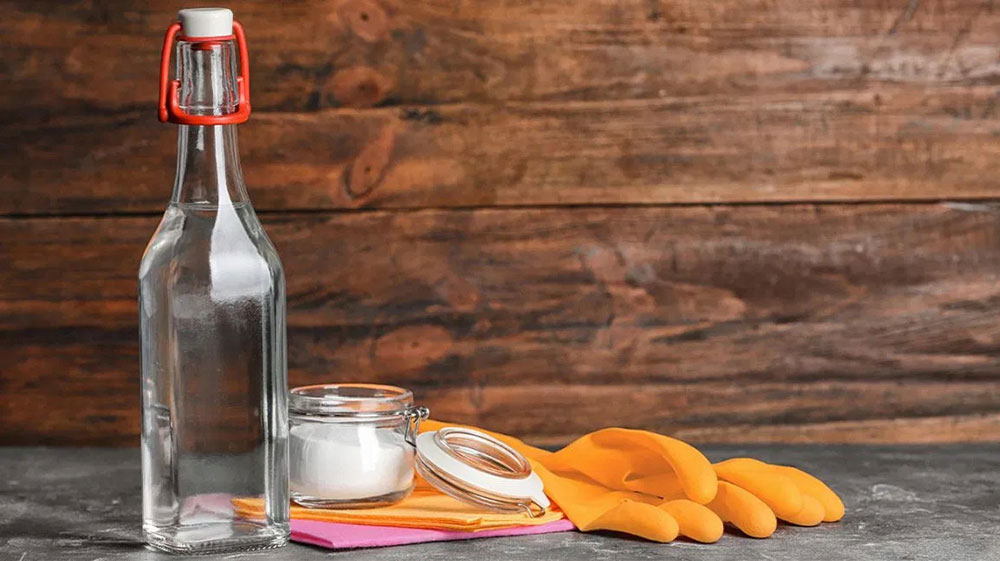

If you want to add a little additional kick to your soak, you might try the baking soda and vinegar soak. Take out your vinegar and baking soda and begin soaking.
- In the baggie, combine baking soda and white vinegar in a 2:1 ratio.
- Allow for fizzing.
- Place the mixture over the spray head and secure it with a rubber band.
- Soak the faucet for 20-30 minutes.
- Combine dish soap and baking soda to form a paste.
- Apply the paste to the bristles of the toothbrush to loosen calcium and limescale.
- Rinse well with running water.
To give your faucet head soak a little more grime-fighting power, you may add a few squirts of dish soap like as Dawn to the baggy mix.
How to Clean a Faucet Head with Lemon
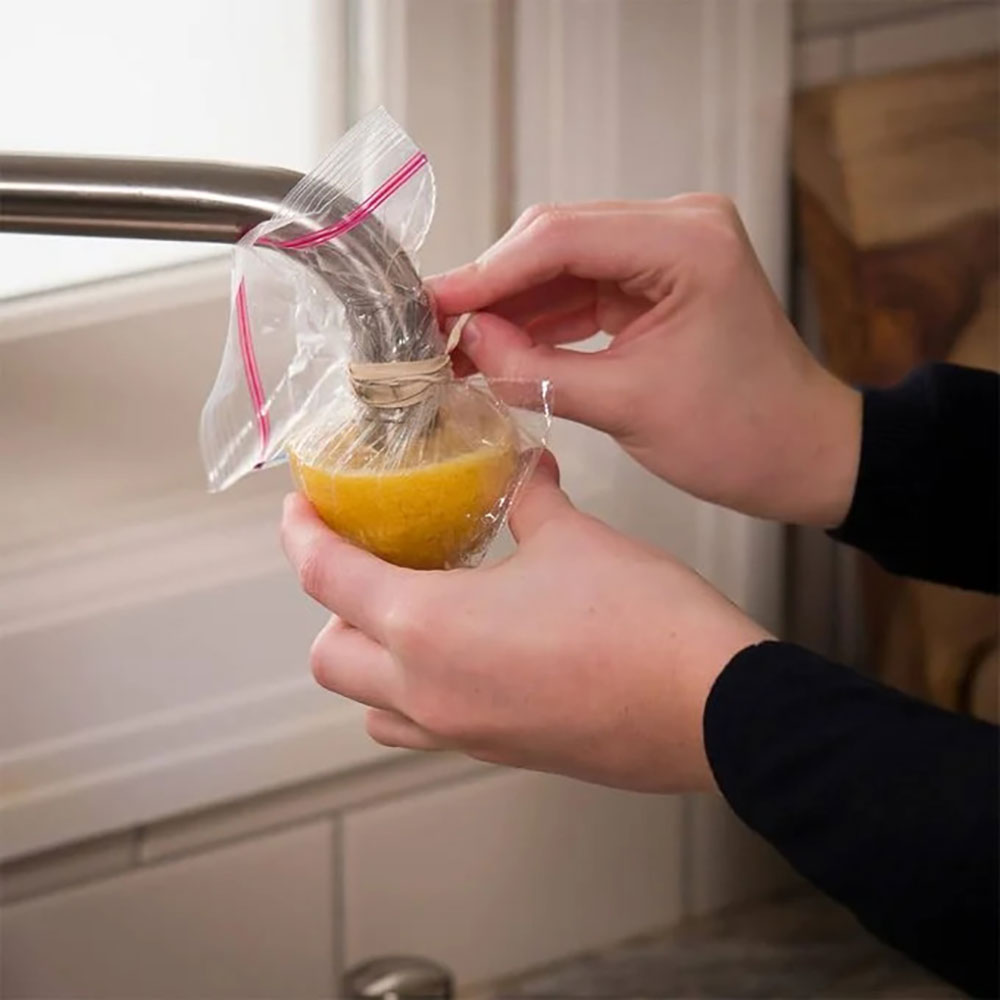

If you ask your mother or grandmum how to clean the kitchen faucet head, they will probably suggest this old method. Also, if the smell of vinegar repulses you, this is your choice.
Fortunately, white vinegar is not the only naturally occurring acid capable of eating away at calcium and mineral deposits. Lemon juice is also very effective at this!
- Halve a lemon.
- Using a butter knife or your thumb, form an indentation in the middle for the faucet.
- Twist the lemon wedge into the faucet so that it is completely immersed in the lemon juices.
- Cover the wedge with a bag.
- Secure the bag with a rubber band.
- Allow the wedge to sit on the faucet for a few hours or overnight.
- Discard the wedge.
- Scrub any residual muck with a toothbrush dipped in baking soda.
- Run water over the lemon juice and baking soda to remove them.
Clean a Faucet Head With CLR
If you have really hard water and a lot of filth, you may discover that a vinegar soak is insufficient. In this instance, you must pull out the major guns. Any limescale remover will work, but one of the most effective is CLR.
- Fill a baggie halfway with the cleaner’s suggested quantity.
- Place it in front of the faucet and let it to soak for 5-10 minutes.
- Remove the bag and remove any leftover residue with a toothbrush.
The CLR Bathroom & Kitchen may be used on chrome or stainless steel faucets/taps but not on other finishes such as bronze, oil rubbed bronze, nickel, brushed nickel, brass, or copper.
How do you clean misting nozzles?
To remove hard water deposits from the nozzles of your misting system, follow these steps:
- Disconnect the system’s blocked nozzle.
- Disconnect the misting nozzle’s O-ring.
- Soak the blocked misting nozzle or misting nozzles for at least an hour in white vinegar or CLR.
How do you clean spray water nozzles?
Remove the nozzle and tap it against a hard surface; this may release the mineral buildup.
If tapping the nozzle does not remove the deposits, remove the o-ring and immerse the nozzle head for about 30 minutes in a small quantity of Aeromist biodegradable nozzle cleaning or white vinegar.
Another possibility is to shove a needle into the spray’s opening to dislodge the sticky substance that has clogged it.
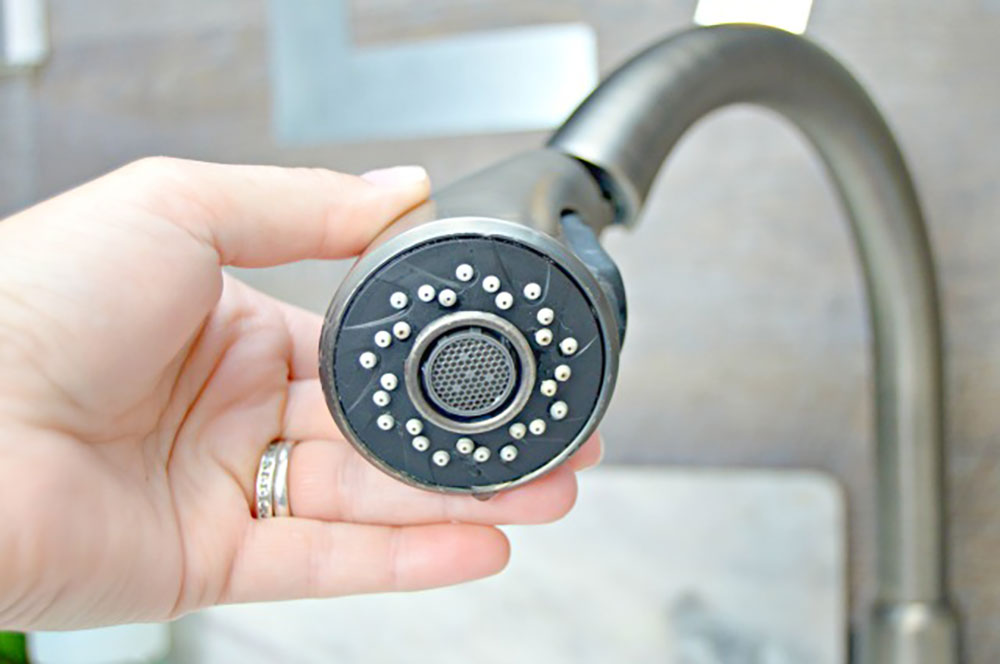
Clean the Aerator


The aerator is the little screen that appears in the spout of a standard kitchen faucet. It infuses the water with air and turns it to a packet of small streamlets. Spray heads, too, include aerators, albeit their placement varies according to the faucet’s manufacturer.
While the majority of aerators are located inside the hose or spray head at the point where the hose joins to the spray head, some manufacturers place the aerator in the spray head’s face.
To remove an aerator from the spray head’s base, take out the spray head, secure the hose with a clothespin or tiny clamp to prevent it from retracting, and then unscrew the head, which is often done by hand.
The aerator is located either within the hose connection or the spray head and may be removed using a flat-head screwdriver. Typically, to remove an aerator from a spray face, you must unscrew it with an adjustable wrench.
Suspend the aerator under a stream of water and use a sponge to remove any silt. In most circumstances, this is all that is required to clean your spray head.
Tackle the surface


You may choose to use rubber gloves while washing with hot water. Wipe off your faucet with a towel dampened with dish soap and water. Scrub any leftover filth with the vinegar and water combination.
To remove obstinate markings, prepare a mixture of water and baking soda and scrub the area with a toothbrush. Rinse well with cold water to eliminate any residue or cleaner. Dry the faucet thoroughly with a clean towel to remove any remaining watermarks.
The Importance of a Clean Faucet Head
Kitchen spray faucet heads need regular cleaning to keep the apertures clear. Clogs develop if you reside in a region with hard water and your fresh water supply lines are not equipped with a water softener.
It takes time for these deposits to accumulate to a size that is visible to the human eye or big enough to obstruct a faucet. Because the apertures are substantially smaller, spray faucet heads are more prone to blockages produced by mineral deposits. A single grain of limescale is all it takes to create troubles with a pull-out spray kitchen faucet.
To clean your kitchen faucets, follow these five procedures. Daily sanitization of these regions is recommended to avoid bacteria development. Rinse the aerator within the faucet on a regular basis and replace it as necessary. With a thorough cleaning, you may effectively eliminate germs from surfaces.
If you enjoyed reading this article about how to clean the kitchen faucet head, you should check out this one on how to organize a small kitchen without a pantry or this one on how to remove the kitchen sink drain.
We also wrote about similar topics like how to remove a Moen kitchen faucet, how long it takes o remodel a kitchen, how to measure a kitchen sink, how to adjust kitchen cabinet doors, how tall are kitchen counters, and how to restain kitchen cabinets without stripping.