
Advertisement
How to build a wooden gate that will last? Let’s check.
Prepare for the job like a pro. Wooden gates may be a handful to those without crafty skills or experience. Before you begin, make sure you have all necessary hand-held carpentry tools, and an idea of how the gate should look.
Here are some of the tools you shouldn’t forget
- Power drills
- Screwdrivers
- A level
- A miter saw
- A jig saw, for the decorating phase
- Coated-deck (or stainless steel) screws, for when you need to put the frame together (for best results, work with 3-inch screws)
- 1 ¼ or 1 ⅝ of the same screws, this time for planking
- Hinges
Estimate the size of the gate. Gates shouldn’t be wider than 4 feet (1.22 m). If they are, you’ll be expected to add a second gate and make the two meet in the middle.
Interestingly enough, the top and the bottom of the entry are often different from each other, and you need to measure them before you start.
The easier way to go is to rely on the narrower measure and to build a square gate. To make sure it will look fine, take also diagonal measurements.
Upon need, anchor and plumb the fence posts. You’ll be doing this to have the peace of mind that your fence is strong enough to resist the gate. If not, the posts will likely get wiggled and pulled to one side, and that may cause the gate to sag.
To avoid such scenarios, consider the size of the fence, and anchor the posts accordingly. They should stand firm and without any possibility to move, and they should be straight up and down.
What exactly do we have in mind? A gate that is 4-feet tall needs 5 inch x 5 inch (12.7cm x 12.7 cm) posts, ideally redwood ones. If you decide to make it two feet taller (1.83m), you’ll need 6 inch x 6 inch posts.
Get the frame dimensions. Preparing the frame shouldn’t be difficult at all, as you’re preparing a simple 4-side box slightly smaller than the opening of the gate.
With a 3×5 opening, for instance, we’d recommend a 3×4 frame made of wood (make sure it is weather resistant!). Therefore, don’t bother too much – leave as much space as necessary for the gate to open and swing, and to accommodate its hinges.
The best way to go is to use the same wood you used for the fence, changing the color for a more versatile look. Redwood is a common choice for large wooden gates, but that shouldn’t stop you from decorating in your own way.
How to build a wooden gate? Here are all the instructions you will need
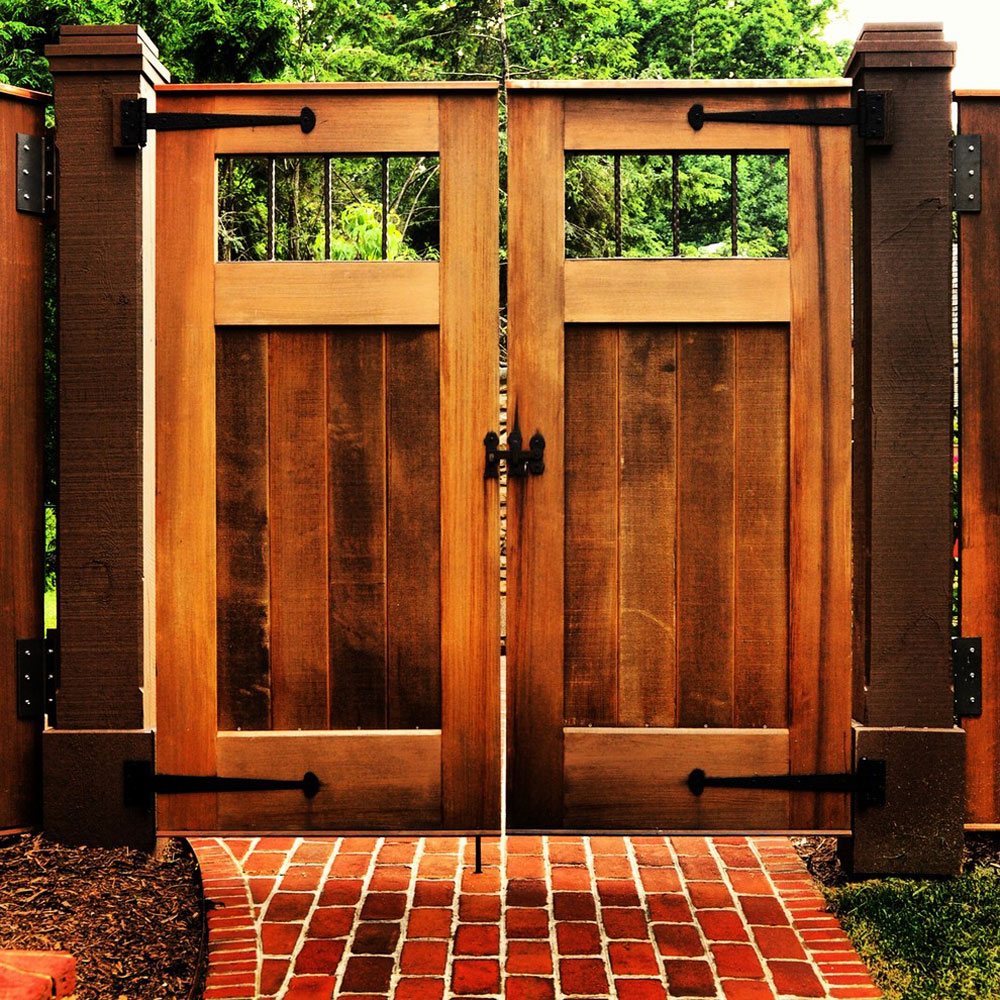 Image source: Cornerstone Builders Inc
Cut the frame pieces and size them using a miter saw. The pieces should be 2 inches x 4 inches (5.08 cm x 10.16 cm). Note that you should cut the top and bottom pieces first (make them identical), and make sure they are slightly thinner than the fence’s opening. Next, prepare side planks that are 3 inches shorter than the gate’s planned height.
Add the screws. As usual, you should pre-drill pilot holes on the planks before you put the screws, as these will protect the wood from splitting. Measure the distance between the top bend and the opposite corner on the bottom to ensure that the sides are even.
The best way to assess gate framing and to attach the rails to each other is to lay the frame down on a flat surface (you can do this on your patio, or even the driveway).
Attach an angled cross-brace to the top and bottom planks. You can do this with desk screws, not forgetting to pre-drill holes for them. This way, you will make a rigid and strong frame that will last.
Use the miter saw to make a diagonal cut. Once placed onto the box, this cut will help you determine the ideal position for the angles (place it at a 5-degree angle between the opposing corners, and trance with a pencil).
Install the planks. Now that the frame is ready to use, you can finish your beautiful gate by attaching the flat planks over ir. Placing the planks on top of the frame will help you determine how to cut them, considering also the 1/8 inch gaps between them left for weather allowances.
The easiest way to cut the planks is with a table saw, after which you should secure them with desk screws.
The finishing touch
Create a beautiful gate top. For many people, the top of the gate is its most important part, and they invest a lot of time thinking how to decorate it. They choose among plenty of popular decorative markers, including their last names, beveled edges, year imprints, and many more. With some skilled jigsaw work, you can come up with literally anything!
Prior to carving and cutting, we recommend you to draw the arc with pencils or strings, and fill in the decorative curves you like. Next, cut the pattern with the jig. If you think you can’t do this yourself, ask for professional help.
Join the gate and the fence with hinges. Place the gate at the appropriate height (1.5 inch off the ground) to get the idea of where hinges should go, and mark these spots on the post with a pencil. Pre-drill holes for the screws, and then attach the hinges to the post and the gate.
Don’t forget the gravity latch. Gravity latch is quite common on simple fences, as it does some great work without complex installation. You can attach it to the gate with several screws, and without affecting its beautiful looks.
Yet, you should only do this before you’ve applied finish on the gate.
Seal the gate. To come up with a real privacy fence gate, cover it entirely with a sealing finish. You don’t necessarily need a professional sealer for this – you can do it with a paintbrush, a garden sprayer, or even a sponge to ensure all exposed surfaces are covered.
Pay special attention to the planks’ bottom, as there where the gate absorbs the most water. If you don’t seal it right, it may rot or lose its color.
Lastly, give the gate a couple of hours to dry. If you live in a humid environment, you may want to give it a day or two.
Enjoy it. Once the wood is sealed and dried, start using your gate! Try to close it and open it several times in a row to ensure that it is well fastened.
This, of course, is not the only way to build a beautiful wooden gate. If you have some more time to invest, try out different wood gate designs and DIY fence gate ideas.
Let us list the necessary wood fence gates tricks:
Here are the tools you will need:
- 12 Western Cedar Planks for the Cedar Tongue and Groove Boards, 1/4-inch x 3 1/2-inch x 96-inch each
- 3 Tight Knot Western Cedar Boards, 1/4-inch x 6-inch x 96-inch each
- 3 Black, decorative hinges, 13-17 inches long
- 2 Black and large barrette bolt latches
- A resistant, black latch for the gate flip
- A miter saw
- A cordless drill
- A pencil
- Straight edge
- A hammer
- Some carpenter glue
- A dozen of longer, galvanized nails (3/8 inch each)
Ready to learn how to build a wooden gate? Here’s what you should do:
Step 1: Cutting the tongue and the groove boards
All instructions in this guide refer to 2-inch wide gates. Nevertheless, you can scale the width as you wish by adding or removing boards.
The height, on the other hand, is probably prescribed in your local building code, so make surre you check that before you begin (in most cases, local agencies prescribe a maximal height of 6 feet). In some states, you will also be expected to get a fence building permit before you begin.
Next, cut the tongue and groove boards until they meet the desired 72-inches length. You can do this easily with the help of a miter saw.
Step 2: Cutting horizontal braces
Take a board other than the tongue and groove ones (any 6-inch wide cedar board), and use a measuring tape and a saw to cut out three 42-inch segments.
Step 3: Lay out the boards
Lay the 3 boards on a flat, level surface (the garage floor, for instance). They should be positioned parallel to each other, with two of them 5 feet apart from each other, and the third one lay exactly in the middle.
Next, position the tongue and groove boards on top of them, and tap the tongues into the groove of the neighboring boards until they’re all completed.
It may happen that adding the tongue and groove boards affected the original arrangement of the 6 inch – wide boards. If so, readjust them in the appropriate positions.
Step 4: Fasten the tongue and groove boards
Use 3/8 inch galvanized nails to attach the tongue and groove boards to the braces. While doing it, pay attention to the lower boards and don’t let them move out of place.
Step 5: Cut a diagonal cross brace
Flip the board over with care. You’ll now need to lay the 6-inch cedar board you have left over the horizontal braces (diagonally), and nail it temporarily to ensure it doesn’t move. The more exposed the nails are, the easier it will be to take them out.
Note that the straight edge should be parallel with the horizontal brace’s lines.
Next, use a pencil to mark six separate cuts to the braces. Once you’ve done it, you can remove the nails safely.
Lastly, use a miter saw to cut the brace at those six spots. As you proceed, you will eventually discard the end cuts and the middle cuts, and use only the two left pieces as diagonal braces.
Step 6: Fasten the brace
Flip the two braces backwards, and apply a line of carpenter glue. Fasten them on the fence, and weigh them down with something heavy to ensure they won’t move. They will need a couple of hours to dry.
Once dry, turn them over and attach them to the fence using 3/8 inch nails.
Step 7: Set the gate in place
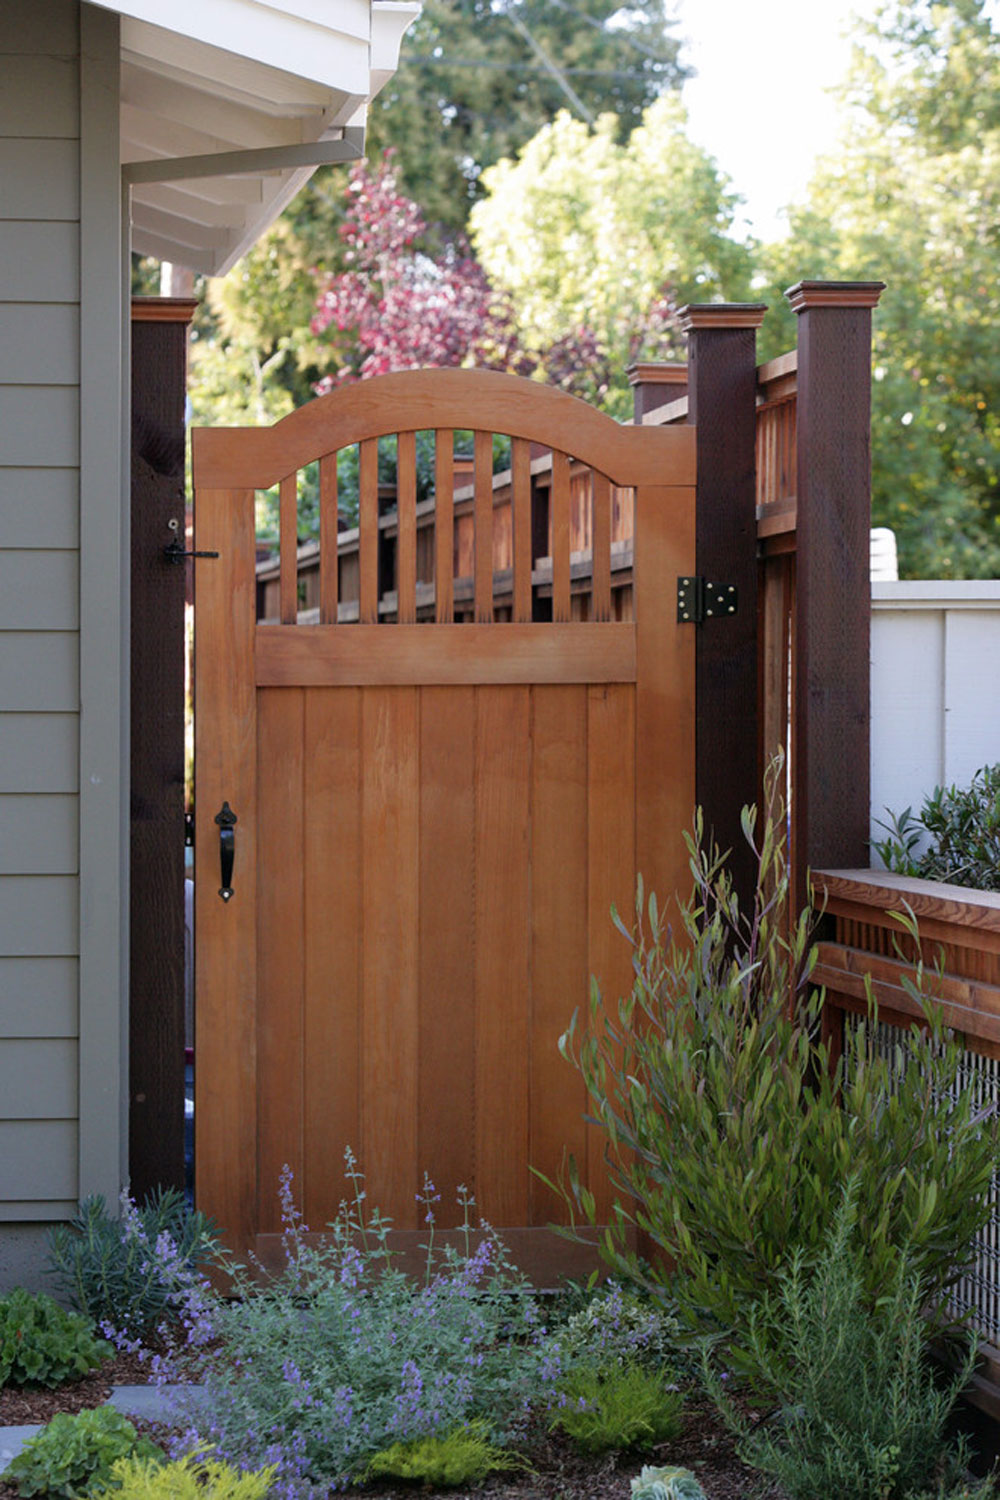 Image source: HWH Home and Garden
Position the gate accordingly, and support it with leftover cedar pieces to ensure some clearance. Call someone to help you and to hold the gate at the ideal distance from the sides (1/4 inches from the hinge side).
You will need a cordless drill to screw three separate hinges, and ensure that the gate can swing normally. It may not work from the first attempt, so adjust it as many times as necessary.
Step 8: Attach the latches
This time, take the cordless drill and the screws included in the latches, and screw the slides (barrels) on the top and bottom of the gate. Their receiving sections should be screwed directly on the frame.
Once done, attach the flip latch as you attached the barrel bolt latches before, making sure that it is positioned in the center, right between them.
At this point, your gate will be ready to use.
Next to our instructions on how to build a wooden gate, we’ve prepared a detailed, step-by-step guide for those looking to merge their wooden fences with their gates. This is how it goes:
Firstly, you need to pick the side of the fence where the gate is going to hang, namely the direction in which you want it to open.
As it was in the other two cases, you need to determine the dimensions of the gate by measuring the exact distance between the posts (top and bottom), and working with the smaller measurement of the two. In this way, you will make the perfect wood fence gate.
Note that the hinges and the lock you’ll choose will affect the size of the gate, so get them before you start measuring.
The frame of your gate
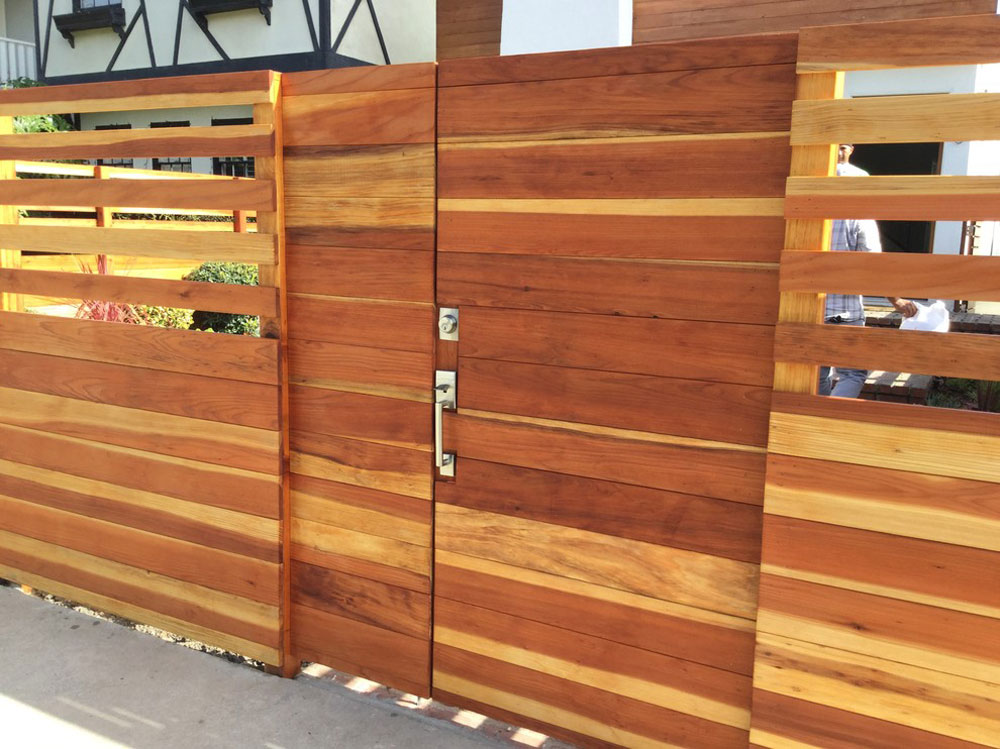 Image source: California Deck Builders
Now that you know how to build a gate, you should think of how to frame it.
First, you should note down the height of the frame. This will depend on how high the fence is, and where you’ve positioned the fence rails. The common practice is to make a shorter gate frame, where the palings/pickets overhang past it by more or less 10 cm on the bottom and the top.
To be clearer, if the gate is supposed to be 1.8 m tall, the frame should be 1.6 m tall (or shorter). In case the rails on the fence are exposed on the sides, you should attempt to line the frame rails up with them.
Since your gate is higher than 1 m, we recommend a mid rail within it to preserve its stability. You can also consider attaching a diagonal brace, as it also helps achieve the ideal square shape, and it transfers the weight of the gate to the posts that hold it.
Assembling and preparing the gate
How to determine the width of the gate? With a doorway of about 990mm, from which we’ve subtracted 20mm for clearance, what we’ve got left is 880mm. We already have the ideal height, and we can go straight to cutting our 75 x 50 piece of timber.
Keep in mind that the shape should be square, and cut the sides and the rails accordingly.
Once done with that, make a rebate on the ends of the timber, and prepare it for a ½ check. The idea is to have both sides overlapping each other and forming a solid and durable joint that won’t let the gate twist.
Cutting the 1/2 check
Lay the cut pieces down, and mark a pencil line on each end (remember that the width should be 75 x 50). Do the same to examine the thickness on both ends.
½ checking is usually performed with miter saws, as most of those come with a lever and can be flipped over for rebating. If working with a saw like this, rebate the ends out keeping the blade depth to the pencil line. You can also use a circular saw, in which case you should make several cuts instead of one, and clean the join up with a chisel.
Now, divide both side pieces in half (lengthwise, 800mm each), lay the off cut upon the centre mark, and then rule lines to enable a ½ check for the centre rail.
To prepare for the middle rail, make a rebate on the side pieces where you’re going to place it.
Try to dry-fit the pieces together to check if they fit. Don’t use glue at this point – if you want to keep the frame together, you can do so with a couple of sash clamps.
Next, measure the diagonals to see if they match. This is the best way to ensure that what you’re getting is a square frame.
To clamp the frame in place, apply some two-pot glue on the joins. You can also use other types of glue, but note that those may be less waterproof and weaker than two-pot. Once done, assemble the frame, and wait for the glue to dry.
As usual, make holes in the joins and screw them together with 38 mm stainless screws (2 per join).
Give the diagonals another look, and make adjustments if necessary.
To make sure that the joins are perfectly flat, you can also hammer them with light moves.
The mid rail should also be screwed in place, but you don’t have to glue it first.
Cutting the brace
The brace should be positioned between the bottom hinge side and its opposing corner. To fasten it there, place the brace piece (75 x 50) over the frame, rule some pencil lines on the ends, and mark the point where the brace and the mid rail will intersect.
Remember to mark the mid rail too, as there will be another rebate, and ½ check on the mid rails joint. Then, cut angles on both ends and inspect the joins.
If everything is fine, put some glue on the ends and the ½ check join, and place the brace within the frame. You can then secure it with a 100 mm screw on each end, and clean any excess glue. Once done, give the frame at least 24 hours to dry.
Here are few more handy tricks that can ease your work:
You can use an electric sander to smooth the sharp edges, and to make the frame look nicer.
Before you paint, cover the frame with a good wood primer to help it absorb the color.
Choose high quality hinges, such as those:
- Suitable for outdoor works and weather resistant
- Solid and able to sustain the weight of your new gate
- Made with leaves wide enough to prevent the gate from binding on the fence
Use sash clamps. You will be surprised how helpful they can be while you’re putting the frame pieces together, and how much they contribute to well-planned fence gate designs.
Don’t apply wood primer before you’ve glued the pieces together.
The heavier and taller your gate is, the more hinges you will need, especially such attached on the top to provide additional support.
If deciding how to build a fence gate that won’t sag, you have to use quality materials. The best timber to work with is kiln dried timber.
Get some help. A large fence gate will require more people on the team.
To get inspired, check the wooden gate plans of popular designers and gardening experts.
Let’s answer some other questions you may have:
How to attach the palings?
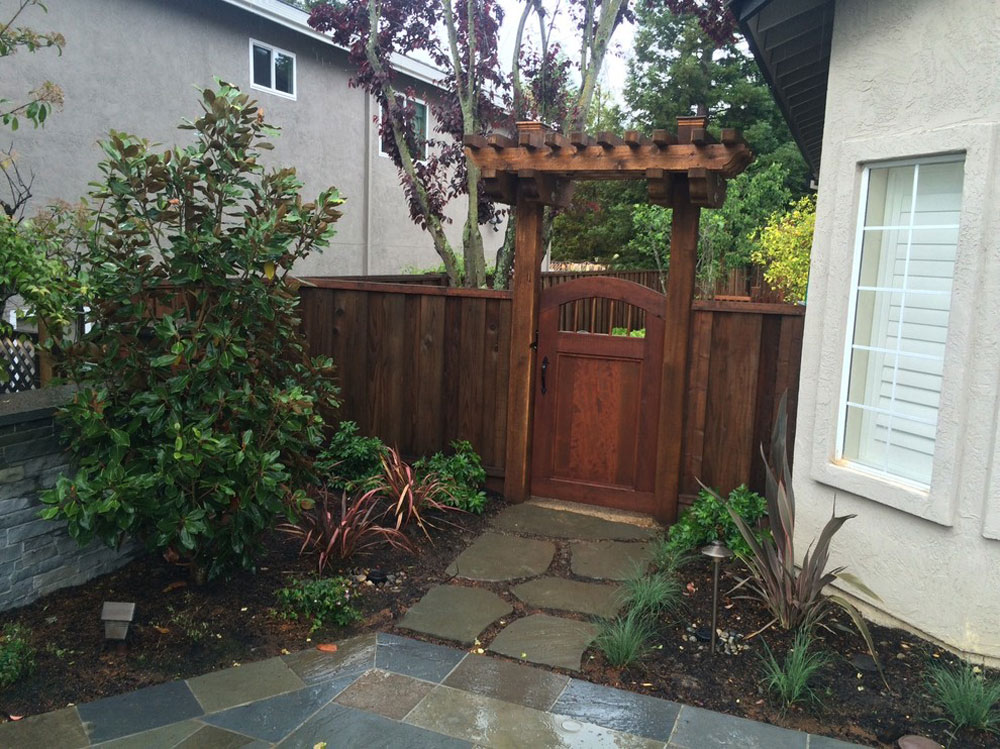 Image source: Riedel Precision Landscaping, Inc.
The fence you have in place will be your best guide. Check the distance between the top rail and the top of the fence paling, and transfer it to the top of the gate palings as you cut them. Size is as important for a simple gate as it is for a luxurious one, so measure carefully.
Pay attention to proper spacing – the ideal gap should be somewhere between 12 and 20 mm. To get this right, you can use a cut a packer to this width and use it as you’re screwing the palings. Then, apply some primer over them.
Another tool that will be very helpful is a level. Place it on top of the palings, and you can align them in straight, good looking lines. Finally, secure them in place with a pair of screws.
How to hinge the gate?
 Image source: Timothy Lee landscape design
Since you already know how to build a gate, you will find attaching hinges to it a piece of cake. Yet, it depends on the type of hinges you’re using. Butt style hinges, for instance, should be attached to the side of the frame, in the same line with the rails.
We advise you to skip checking hinges into the fence’s posts or the frame, just to secure some adjustment space in case the gate moves or rubbles.
‘T’ hinge users, on the other hand, can fasten the gate with only one hinge laid in line with the rails.
How does it work? Place timber packers under the gate to ensure it is as high as the fence, and align the tops with a straight edge. Butt hinge users should at this point mark the spot where the hinge hits the post, check whether the gate opens right, and then screw it to the fence.
In case you’re using ‘T’ hinges, measure the gaps on the gate’s sides to ensure they’re even (a pair of wedges can help you do this right). Next, attach the leaf portion of the hinge to the post.
Attach the latch
 Image source: Pacific Garage Doors & Gates
To attach the latch, close the gate and screw it on the posts’ striker parts. After so many construction efforts, your gate will finally be ready to use.
Final thoughts on how to build a wooden gate
Learning how to build a wooden gate may not be the easiest task ever, but it certainly pays off. Alongside the fact that you won’t have to pay for professional assistance, you will have a personalized masterpiece to enjoy each time you arrive home.
If you liked this article on how to build a wooden gate, you should check out these as well:
- Outdoor shower ideas to create an outdoor experience
- Tips for Designing the Best Outdoor Kitchen And Backyard Kitchen Designs
- Outdoor House Lighting Ideas To Refresh Your House