Advertisement
A retaining wall can be one of the best decisions that you add to your landscaping. When you get it built in the right location, it is going to ensure that the soil in your landscaping will not erode. But you do have some options to make it a really beautiful part of your landscaping, rather than just a functional one. Building a retaining wall is a fun project that can look great and will offer many benefits to your home.
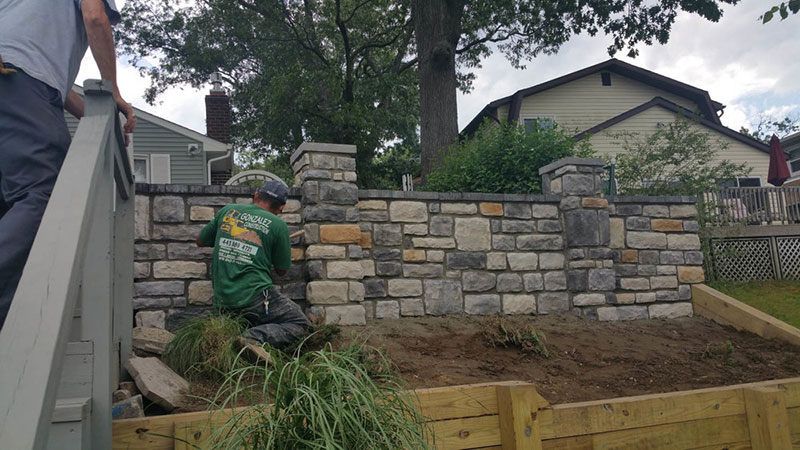
But how are you supposed to build a retaining wall for your needs? It does take some time to get it done and it is likely that you will need some help to get it going. One cost-effective and durable option for retaining wall construction is to use concrete sleepers. However, if you live in an area with heavy rainfall or soil erosion, you may need a more robust option for your retaining wall. In these cases, it is advisable to use steel posts to provide extra support and stability to your retaining wall. Steel posts are durable, long-lasting, and can help prevent soil erosion and structural failure. By combining concrete sleepers with steel posts, you can create a retaining wall that is not only functional but also visually appealing. Take a look at some of the steps below to help get this done.
Plan Out the Location
The first thing to do is plan out the location. Pick out some material that will be strong and durable and decide to do this on a period where you have not had rain for at least a few days for the best results.
From there, take out a tape measure and decide the length and the width that you would like the retaining wall to be. You can then mark off the area with garden stakes and some string. Tie the string to the stakes at the height where you would like the wall to be, checking that the string is level all the way across. You can curve the wall, but you do need to use paint for this to help show how the wall is going to work.
Dig a Trench and Prepare the Ground
If you would like the retaining wall to do well, then you need to have a level base as well. You can begin by using a shovel to dig into the ground. You need to have the hole deep enough that you can bury a minimum of half the height of the first level of blocks you plan to use, or you risk it falling over. You also need the trench to be twice as wide as one of those blocks as well.
When the trench is dug, you can compact it down to make it flat. A hand tamper is a good option to use here or you can do a pale compactor that vibrates to help as well. Make sure that the bottom is level and smooth and that your trench is going to account for slopes that show up.
Lay the Base
You need to add down a solid foundation to help make sure that your retaining wall is not going to have to worry as much about soil erosion. Choosing gravel is often one of the best options to work with, usually with stones no more than ¾ of an inch. You can use a rake to make sure that the stones are distributed well.
Lay the Base
Now it is time to lay down the base that you would like to work with. You will take the first course of blocks and have them center in the middle of the trench. Position the first block, using a block to make sure that it is as even as possible. Continue laying the blocks down the way you want the retaining wall, while checking that everything is level. If something is off on this one, then it can ruin the whole wall later on. When this is done, you can fill the space between the wall and the landscape with some more gravel to keep it in place.
Cut the End Blocks
You will want to stagger the blocks to make them a bit stronger in the wall. This means that you will need to cut the end blocks of each of the even-numbered courses (so on the second level, the fourth level, and so on), to help make this happen. You can work with a straight edge to help draw a guideline down the middle of the block. A circular saw with a masonry blade can do a good job with this one as well. Remember to wear the right ear and eye protection to help as well.
Lay the Additional Courses
If you took the time to lay down an even first layer, then the rest of the layers are going to be a lot easier to work with. You can brush off the first layer and then start on the second one, starting with one half of the end blocks that you cut on the previous step. Lay the rest of the blocks, getting them to interlock as you go. Check to make sure that it is all staying level as you go. You can keep going up the wall with the same method over and over again until the retaining wall is as tall as you would like.
Backfill the Wall
Once the courses are all done with the number of blocks that you want to use and you have added in any drainage that you want, it is time to backfill the wall. You will want to cover up the back of your wall with some fabric for landscaping so that the sand won’t start to seep between the blocks that are there. For those who are using gravel, you can add the gravel after each level of blocks that you put down, making sure that you tamp it down to avoid hollow areas as you go.
When you are ready to add in a retaining wall to your property and you are convinced that the benefits work for your needs, it is time to find the right professionals to get the work done. At Annapolis Retaining Wall and Garden Wall Construction, we are here to help make your dreams a reality. We can help you to create the right retaining wall to ensure that the landscaping is going to look as amazing as possible, turning your dreams into reality in no time. Trust our team to be there to help you with your retaining wall needs.