Advertisement
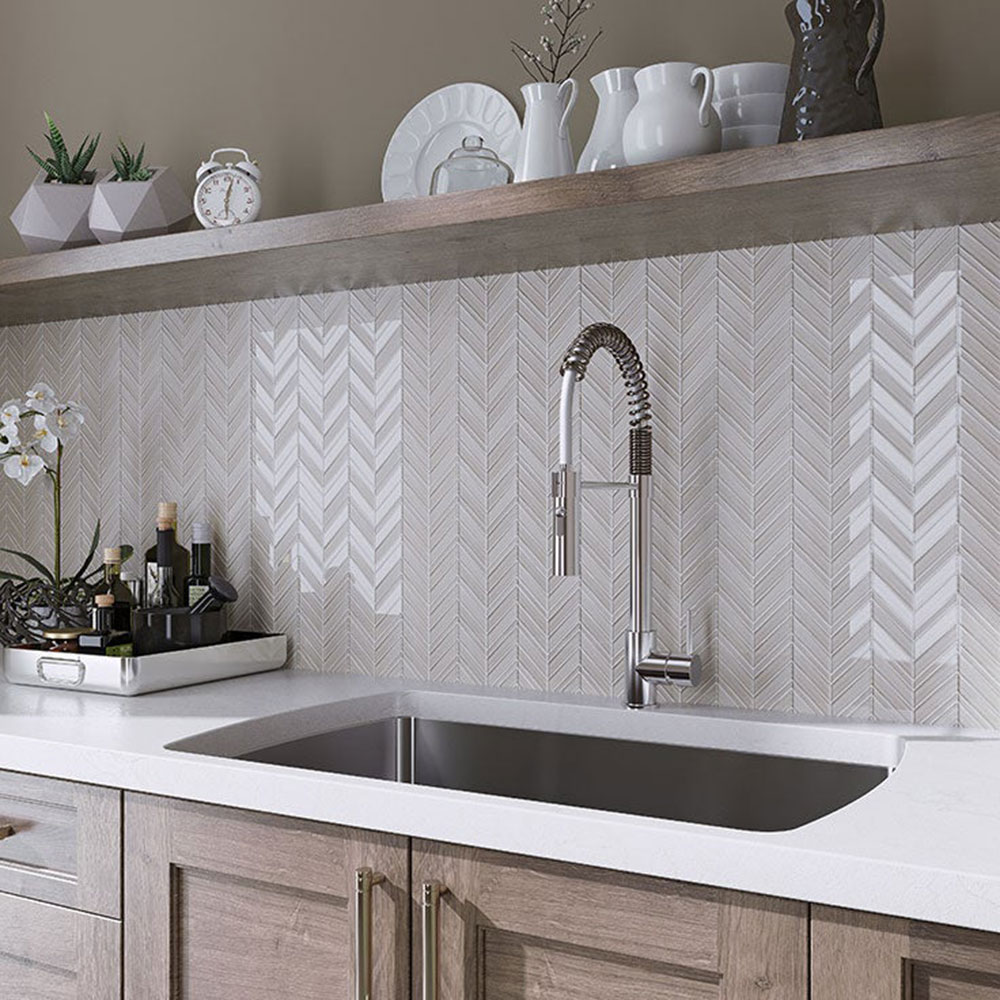
Installing a glass tile backsplash in your kitchen makes a statement with its shimmering light and vibrant hues. Because of its beauty, adaptability, and durability, glass tile is a popular material for wall backsplashes.
While installing a glass tile backsplash is a simple DIY home repair job. However, it’s vital to know that installing a glass tile backsplash has some unique complications.
In this post, we will walk you through the steps of installing a glass tile backsplash. In this article you will learn about some things you will need to do and buy when starting a backsplash tile installation project:
- tile adhesive
- tool for making tile cuts
- choosing some glass mosaic tiles or any other sort for kitchen backsplash
- choosing right materials, long-lasting
- outlet covers
- tile spacers
- making sure the entire wall is perfectly flat
and so on.
If you want to learn more on how to install glass tile backsplash, keep reading this article.
Repair and Clean the Wall

Cover the countertop with plastic sheets and tape it down. The wall should be completely flat, with no bumps or depressions before glass tile installations.
While a porous surface, such as fresh drywall or backer board, provides the best bond with this set, you may tile over a painted wall if you rough it up beforehand with an 80-grit sanding sponge. If your walls are brilliantly colored and you’re installing transparent glass tile, use a sealer-primer before sanding so the color doesn’t bleed through the thinset.
Turn off all outlets and switches in the installation area, and then remove the switch and outlet cover plates, as well as the switches and outlets themselves. Using 80-grit sandpaper, sand the wall surface. Wipe the wall down with a damp sponge to remove any sanding dust.
Create a Countertop Spacer
The bottom row of glass tiles will require a 1/8-inch gap between the bottom row and the top of the countertops. As a spacer, a single layer of scrap cardboard glued to the counter using painter’s tape works great.
Install a Temporary Ledger
To serve as a ledger, attach a scrap piece of 1x timber to the wall between the counters with drywall screws. The ledger’s top should be level with the top of the cardboard spacer.
Establish the Tile Centerline

Choose a focal point for the glass tiles that people will notice immediately when they look at the tile backsplash. This is the point at which you will begin your layout. Typically, this is the area above the range. To identify the precise center, measure the length of the overall focal-point region and split it in half. Mark this location on the ledger or counter with painters’ tape so you can see it as you work.
Dry-Fit the Horizontal Dimensions
Lay the glass tile out on the countertop. At this step, you should choose your horizontal spacing. As far as possible, avoid putting cut tiles in obvious spots.
For example, if there is a corner on the left side and a refrigerator on the right side, start with complete tiles on the left and conclude with full tiles near to or behind the refrigerator. Because the outlet faceplate gives up to 1-inch of coverage in all directions, you have a little more leeway with outlets.
Cut the mesh backing that keeps the tiles together using scissors.
Dry-Fit the Vertical Dimensions
Most kitchens have a 20-inch gap between the top of the countertop and the bottom of the wall cabinets. The overall height of two mosaic glass tile sheets stacked is 24 inches. As a result, you’ll have plenty of areas to work with.
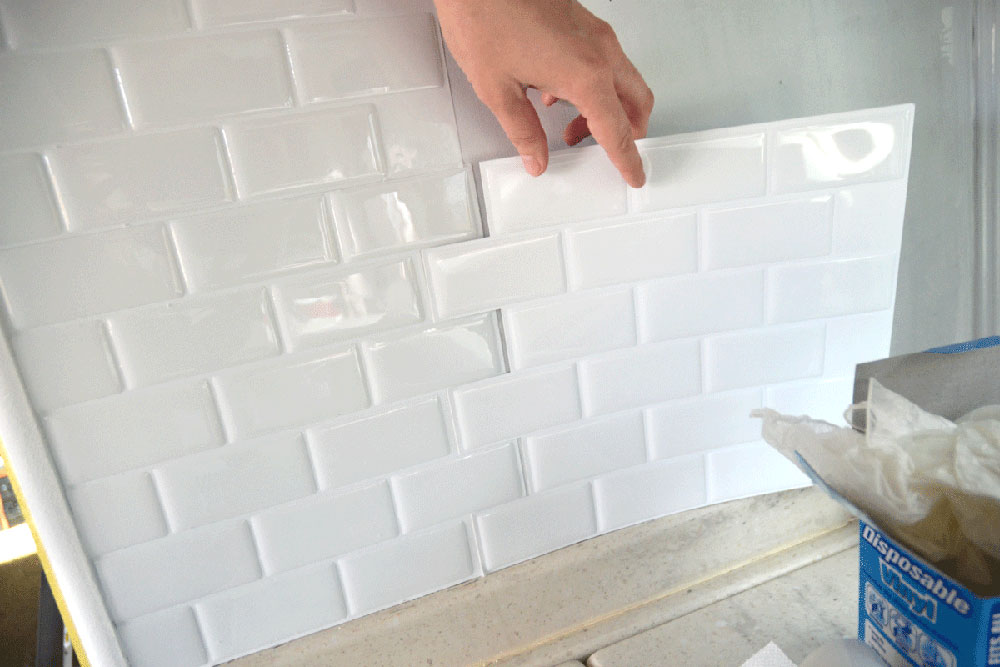
Place one portion of tiles against the wall, resting on a cardboard spacer. Hold the second portion 1/8-inch below the bottom of the wall cabinet, overlapping the bottom section. Determine where you want the glass tile sheet to be cut.
Using scissors, cut the tile to the right vertical dimension, as well as any cut-outs for electrical outlets, as in the previous step.
Mix and Apply Thin-Set Mortar

In a bucket, combine thinset and water. Allow the mortar to cure for about 10 minutes after it has been mixed.
Make a few areas in your workspace. Starting in the focal-point region, cover the wall with thinset using the flat edge of a trowel with a 3/16-by-14-inch V-notch. To produce a generally consistent thickness of 14 inches, use a fanning motion.
Keep a sponge and water on hand for on-the-go cleaning. Thin-set will remain usable for 45 minutes, but don’t apply too much at once.
Work in tiny pieces to prevent the thinset from curing, or “skin over.” If this occurs, simply scrape it off, trash it, and apply a new coat.
Comb the Thinset
Comb the thinset horizontally with the notched edge of the trowel held at a small angle to the wall. Return any extra thinset that collects on the trowel to the bucket as you work.
Smooth the Combed Thinset

Because notched lines will show through translucent glass tile, smooth the thinset using the trowel’s flat in a downward stroke. During this operation, do not remove any thinset from the wall. When you’re through, the thinset on the wall should be even 1/8 inch thick.
Place the First Tile Row

Press a sheet of tiles into the thinset at the centerline, sitting on the countertop spacer. One of the sheet’s edges should be parallel to the centerline. As you continue, use 1/8-inch spacers to maintain a regular distance between tiles. When the mortar begins to cure, you may remove the spacers.
Tap the sheet with a hammer and a small scrap piece of one-by-four to secure the tiles.
Fill in the Tile Field
Set extra glass tile sheets from side to side within the title field. When you’ve finished the bottom row, go to the second (top) row. Tap the tiles occasionally with a one-by-four and a hammer to flatten them, especially where tile sheets intersect.
Insert accent tiles or liner bars where you want them.
Keep an eye out for vertical and horizontal lines, and use the level to keep track of your progress.
Cut and Polish Tiles
When you arrive at an electrical outlet or an edge, use a wax pencil to mark the tiles where they’ll need to be cut. There are several methods for cutting glass tile, but using a wet saw is the most successful for both tiles and tile sheets. Glass nippers may also be used to cut individual tiles from tile sheets. It is generally easier to separate individual mosaic tiles from their backing and cut each piece using nippers for intricate cuts. Apply a thin layer of thinset on the cut pieces.
If the cut end tiles are to be visible, use a grinding stone to polish the cut edges to give the tiles a more polished appearance.
Grout the Tile Backsplash

Grout with unsanded grout to avoid harming the glass tiles.
Mix the unsanded grout to the consistency required by the manufacturer’s guidelines after the mortar has been set and the tiles have been cleaned of any excess mortar.
Use a float to apply the grout, sliding it over the tiles at a 45-degree angle. Applying too much pressure may cause the tiles to sink into the thin-set or push them out of plumb.
Back away from your work every now and then to ensure that no tiles have shifted and that everything is in order.
The first portion of tiles should be dry enough to sponge by the time you reach the end of one wall. Wipe the grouted tiles clean with a damp sponge held at a 45-degree angle, taking care not to indent the grout lines.
When the grout is dry, use a soft cloth to remove the haze from the tiles.
Caulk the Tile

Apply a bead to the perimeter of the tile backsplash area, where the tiles meet your walls, cabinets, and countertops, with a caulk gun and the complementing acrylic caulk for your grout. Allow to cure for a few hours.
Remove the ledger between the two counters and replace your range. Replace the outlet and switch covers, as well as the outlet and switch covers. Depending on the tile thickness, electrical-box extenders may be required to bring the boxes level with the tile surface and guarantee that there is no gap between the outlets, switches, and cover plates.
Tips for Installing a Glass Tile Backsplash
A laser level is useful, but not required while installing a tile backsplash. The laser line maintains your centerline straight and guarantees that the tile rows are level.
Allow plenty of time to dry-fit the tile on the countertop before installing it on the wall. It’s best to have all spacing difficulties figured out ahead of time—long before you start working with thin-set mortar.
One of the most important tips when learning how to install glass tile backsplash is this one:
Don’t forget to make sure the wall is perfectly flat before the installation process. If you install tile on a wall that is not prepared, it won’t be set properly. So, before you install a tile backsplash, make sure you prepare the working surface.
A word of warning concerning glass tiles behind cookstoves: Some glass tiles expand and contract at a far faster pace than ceramic tiles. In order to assess whether you need to put grout lines somewhat wider behind a hot stove, ask the tile store (or manufacturer) for a movement joint schedule. Also, some adhesives and sealants may react with the back coatings of some glass tiles, so make sure you have a list of suitable adhesives and sealants from the manufacturer.
When selecting grout, seek something that will not scratch the tile’s surface. This includes avoiding sanded grout and inspecting the box to verify the grout is scratch-resistant. Nonporous, urethane-based grouts, which do not require sealant, have proven to be quite popular. Any grout color is OK as long as it suits your tile.
With good preparation and good materials, learning how to install a glass tile backsplash is not really that hard.
If you enjoyed reading this article on how to install glass tile backsplash, we also wrote about subjects like what backsplash goes with black granite, how to install kitchen backsplash on drywall, how to remove backsplash tile, how to whitewash travertine tile backsplash, how to clean brick backsplash, what backsplash goes with granite countertops or what backsplash goes with white cabinets.