Advertisement
A tile backsplash will bring new vitality to your kitchen. While it may take some effort on your side, you do not need to be an expert to understand how to install a drywall tile backsplash. With sufficient preparation, even intermediate-level DIYers can grasp the fundamentals of tiling a tile backsplash. Follow the instructions below to learn how to properly install a tile backsplash over drywall.
In this article about how to install kitchen backsplash on drywall, you will learn all the necessary steps of the tiling process. The steps below will guide you through the four stages of installing a tile backsplash:
- measuring
- getting the wall ready for the backsplash installation
- designing a layout
- affixing the tiles, followed by
- putting in the grout and completing the job
Let’s see how to install a kitchen backsplash on drywall.
Step 1. Measure The Wall
The square footage dictates how much time is required for tiling a kitchen backsplash. Proper measurements could help you save money on tile installation.
Calculate the amount of tile you’ll need by measuring your wall. If you simply need to cover one piece of the wall, double its width and height to get the square footage.
When tiling, keep an eye out for outlets and switches and make sure you account for them.
Include an additional 10% of tile to cover any tiny gaps or to replace broken pieces. More calculations are necessary if your walls have unequal portions, as indicated in this tutorial.
You will be measuring four different regions. Section “A” is the area on the left side between the cabinetry base and the countertop. The wall’s middle is represented by space “B.” Space “C” is the space on the right side between the cabinetry base and the countertop. Space “D” is located beneath the window.
Multiply the width and height of each area, then add the totals to get the total square footage of tile required to finish the project. Remember to budget 10% of the total for spare parts. Check to see if you have enough mortar, mastic, and grout.
Step 2. Prepare the Walls for Tile
Home remodeling can be a dirty business. When learning how to install kitchen backsplash on drywall, prep work is crucial.
Begin by securing the space around your work surfaces with tape and, if necessary, drop cloths.
Sheets of cardboard placed beneath the drop clothing provide additional protection if a heavy tile or equipment falls on your counter or work surface. Also, don’t forget to cover your sink!
At first, clean the wall by removing grease if there is any. Also, treat wet areas before you start backsplash installation. To have a successful tile project, remember to never place a backsplash tile on an unprepared surface.
It does not have to be ‘paint ready’ or free of blemishes, but it must be smooth. Allow drying after wiping off with a moist cloth to eliminate any lingering dust.
To seal the new drywall, prime the area. To avoid cut-in work when painting the remainder of the room, prime an area bigger than the area you intend to tile. Alternatively, prep and paint the entire wall/room before beginning your tile installation.
Remove outlets and covers
Remove any outlet and switch covers using a screwdriver, and then wrap the outlets and switches with painter’s tape to protect them throughout the tiling procedure.
Fix Wall Imperfections
Depending on how the old ceramic tile kitchen backsplash was connected, removing it may cause harm to the drywall surface. Smooth on a thin coat of drywall compound using a drywall taping knife to repair the drywall.
Fill any cracks or holes with caulk and sand smooth. Vacuum up the dust after sanding the area with medium-grit sandpaper. Allow drying after wiping with a moist cloth to eliminate any leftover dust.
Attach a ledger board
Attach a ledger board — a solid piece of lumber affixed for stability — using a level. We’re going to use a straight 1-inch-by-4-inch board in this scenario. Screw the ledger board to the wall studs where the backsplash’s bottom edge will be. The ledger board acts as temporary support for the tile until the glue sets, keeping it level in areas where there is no countertop.
Step 3. Create the Tile Layout

Make a note of the size of the backsplash.
Determine the measurements of your preferred tile backsplash and mark the top and side boundaries with a chalk line on the wall. A conventional backsplash reaches 4 inches above the countertop, which is a reasonable minimum height for protecting the wall from splashes and spills, but you may make a higher kitchen backsplash for aesthetic purposes.
Tile backsplashes that reach all the way from the countertop to the bottom of the upper cabinets may be seen in some of today’s most attractive kitchens.
Set starting and endpoints
Mark your beginning and ending positions on the wall using the tile. Your beginning position is determined by the most visible part of the wall.
Some tile designs look best when they are centered on a focal point, such as a faucet or stove.
Also, make sure the curb behind the sink, stove, or counter is level. If you don’t, and just start laying a bottom row of tile on top of it, your grout lines will be uneven. To compensate for the unevenness, trim the bottom row of tile. Things become considerably easier if the top of your bottom course of tile is level.
Plan the Horizontal Tile Design

Dry-lay tile horizontally on the countertop along the wall, using spacers to verify the ends. If the cut tile is too thin, change the arrangement so that you may cut broader portions on both sides.
Plan the Vertical Tile Design
Examine the vertical arrangement. Cut tile is best hidden beneath cabinets, but if your countertop isn’t level, you may have to cut from the bottom.
To begin, use a level to determine the lowest point on the countertop. Hold a tile in place, allowing for 1/8-inch expansion space. Make a mark on the wall near the top of the tile. Then, with a level, extend the line across the work area. This line will be your cutting guide as you install tile along the counter.
Cut Tiles
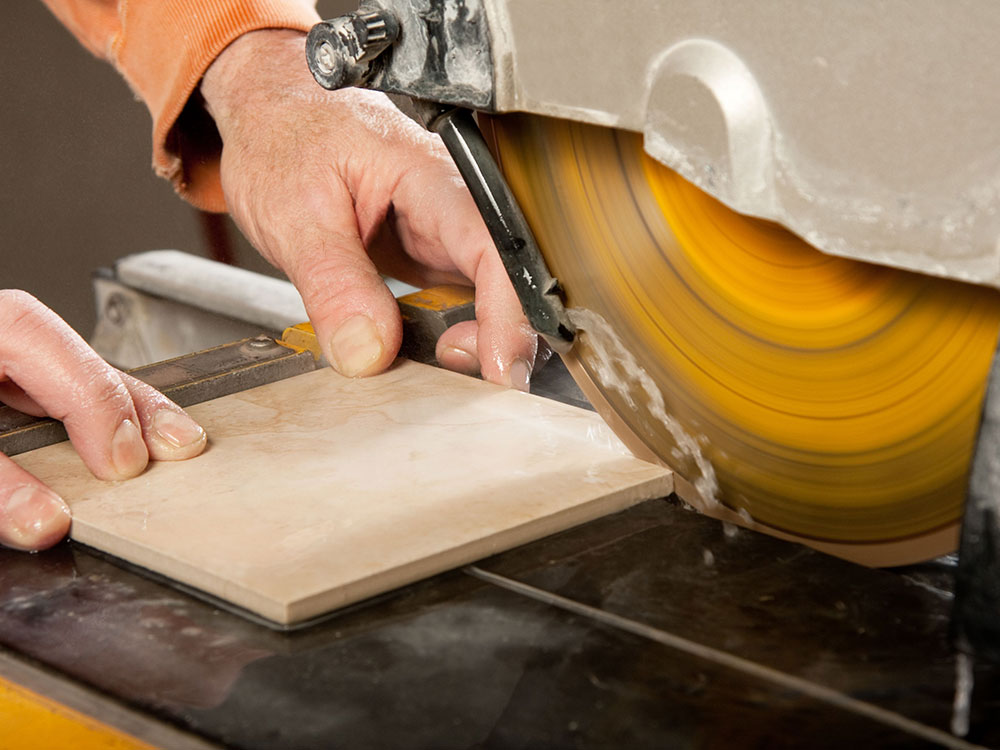
At this stage, when you start to install tile on the wall, you may need to use a tile saw or a tile cutter to trim certain tiles to fit around outlets or switch boxes. If the kitchen backsplash tiles butt up against cabinets or trim, you may need to cut them to fit.
You are now ready to tile!
Step 4. Tile the Backsplash
Apply Adhesive to the Wall
To install wall tiles for house improvements, such as a backsplash, two fundamental materials are utilized: Portland cement-based mortar, commonly known as thinset, and mastic, an organic tile adhesive used solely on drywall applications like backsplashes.
Option 1: Prepare thinset or your preferred tile glue according to package guidelines and apply it to a small portion of the wall with a drywall trowel. Because thinset and other tile adhesives dry rapidly, it’s critical to work in tiny pieces. Using a notched trowel, comb it over.
Option 2: Peel-and-stick tile backsplash mats are also available, and when firmly pushed with a grout float, they adhere instantaneously to wall surfaces. Many self-stick wall tiles may be applied over existing tile or a smooth wall surface, such as painted drywall. Because the glue will not adhere as well to unpainted drywall, do not put the tiles directly to it.
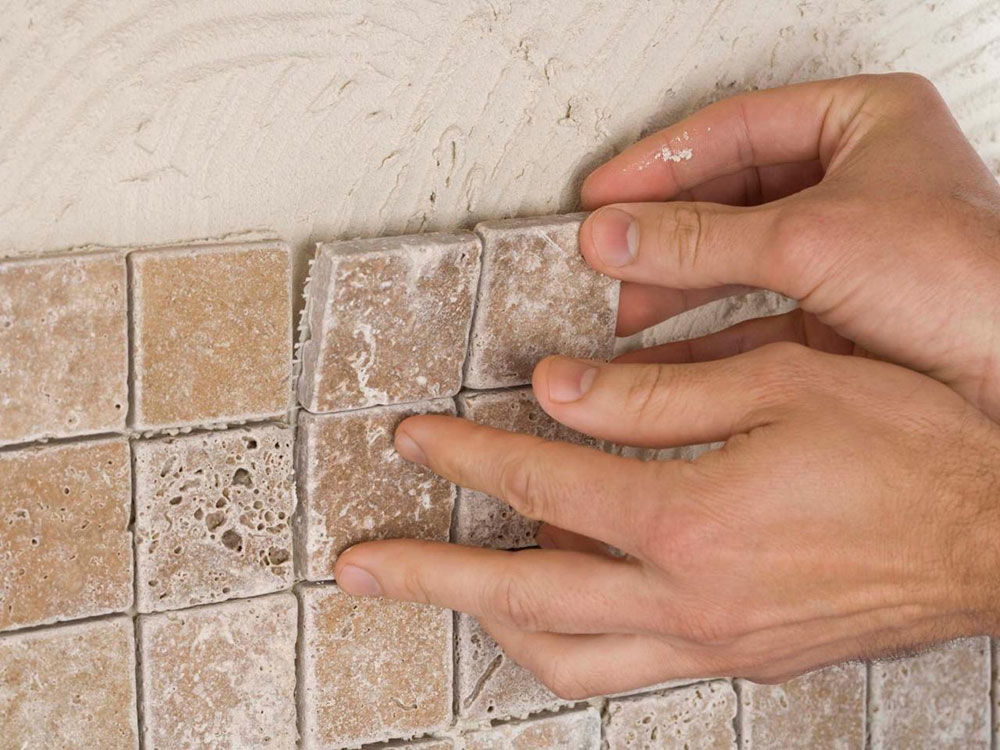
Lay Tile
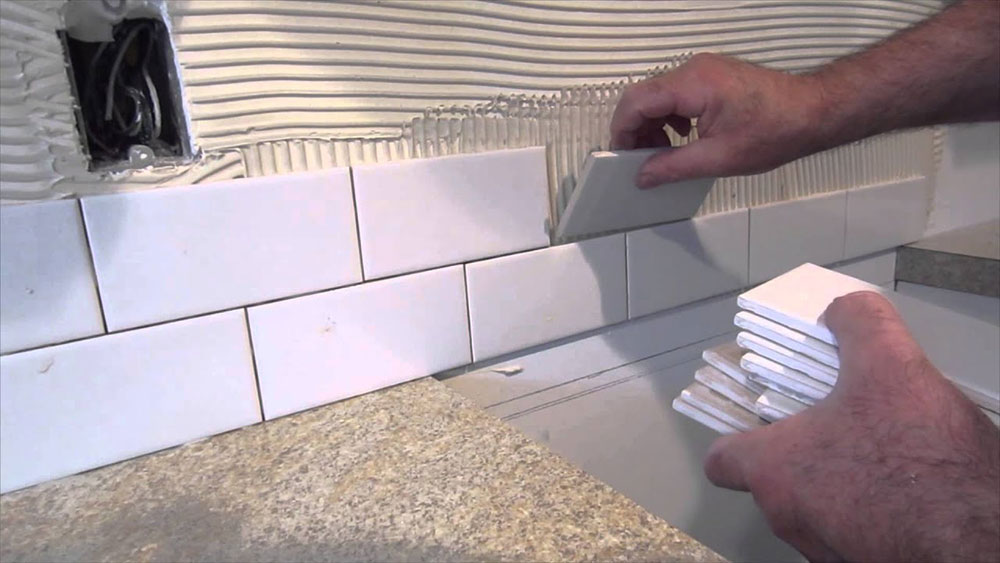
Arrange the tiles on the wall. Use tile spacers to assist keep the tile pieces aligned. Follow the lines you drew when you dry-fitted the tiles to the wall.
If required, use a grout float to flatten the tile.
Mark the tile if you need to make a cut. Set the tile in a tile cutter mesh side up and score the face for greater tile cuts. Each component should be broken along the line. Use nippers for smaller tile cutting.
Pre-Seal Tile
Allow the mortar and tile to cure completely, as directed by the manufacturer. This normally takes 24 hours, however, it varies depending on the mortar and the temperature of your home.
Apply a pre-sealer to natural stone at least three hours before applying grout. The pre-sealer protects the stone from discoloration.
Step 5. Grout Tiles and Finish
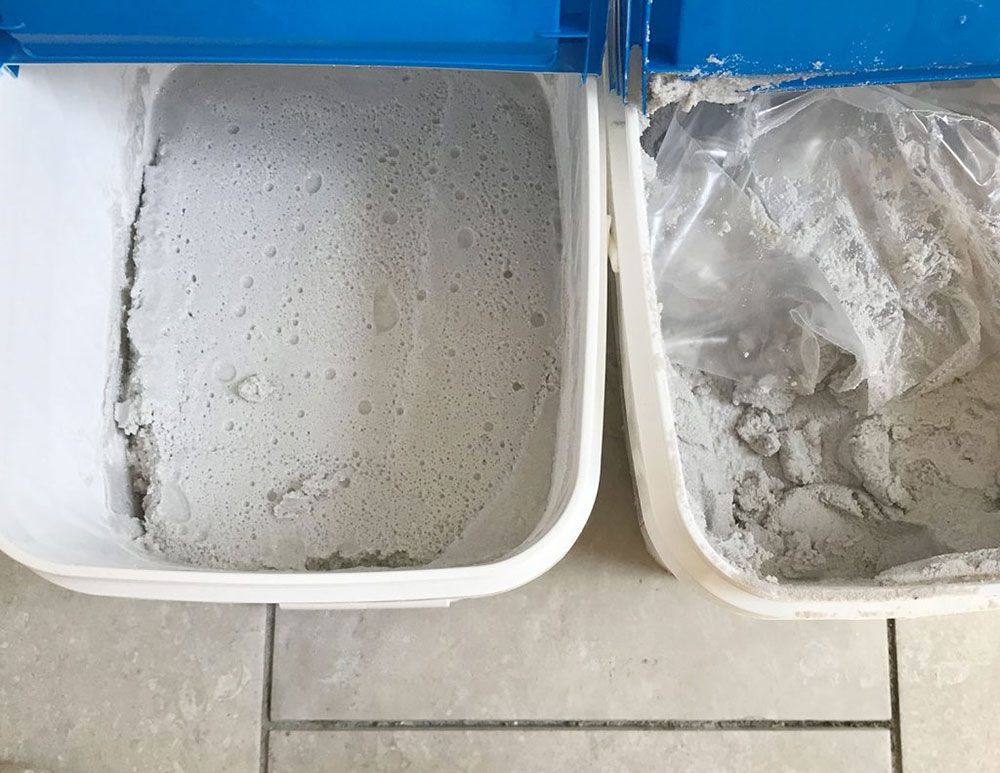
Prepare Grout
Consider utilizing a poly-blend sanded grout, which is made of cement. Sanded grout is ideal for joints of 1/8-inch or larger. Use poly-blend unsanded grout for grout joints less than 1/8-inch.
Before applying poly-blend sanded grout to natural stone mosaic tile, clean the tiles with water and remove all spacers. Pay close attention to the preparation instructions on the packaging.
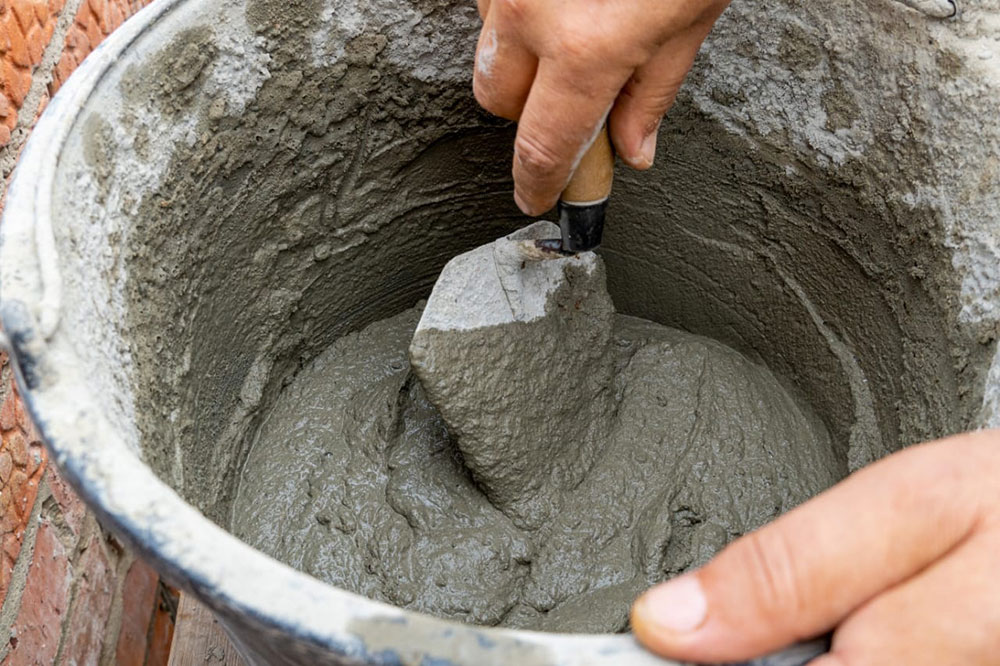
Fill a bucket halfway with the required amount of water. Then, gradually add the grout powder and completely mix it in.
Allow the mixture to remain for 5 to 10 minutes before re-mixing it without any extra water. Maintain the consistency of the grout by re-mixing it on a regular basis.
Apply the Grout

Apply grout diagonally across tiles, pressing it into the joints with a rubber float.
To remove extra grout, hold the edge of the grout float at a 90-degree angle to the tile and drag the float along the surface of the tiles. A tiny quantity will remain on the tile’s surface, but you’ll remove most of it in the next step.
Wipe the surface of the tiles clean with a moist tile sponge immediately after removing excess grout with the grout float. Wipe in a gentle circular motion, being careful not to push the sponge into the tiles. The sponge will quickly gather up grout as you wipe, so have a clean pail of water nearby and rinse the sponge periodically. Continue wiping until the tile surface is generally clear of grout residue.
Allow at least four hours for the grout to cure before buffing the surface of the tiles with a soft dry cloth to eliminate any haze left behind by the grout.
Seal the Grout
Allow grout to cure as directed by the manufacturer, then apply grout sealer as directed by the manufacturer.
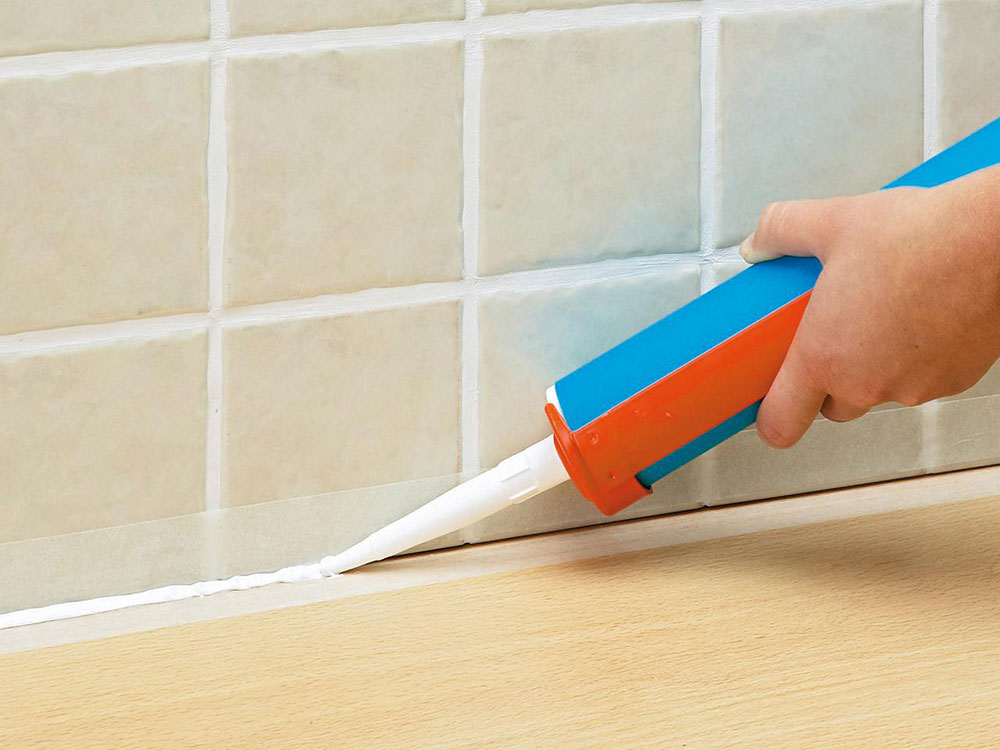
Fill the expansion gaps
Caulk or silicone sealer should be used to fill the expansion gaps.
Replace the Outlets and Switch Covers
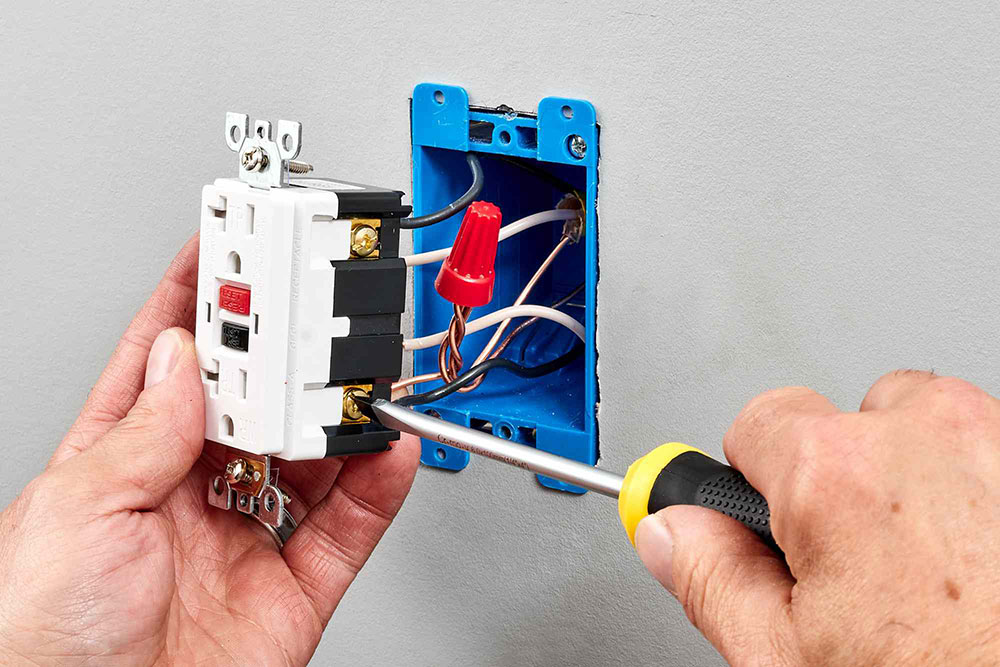
Install box extenders to raise plugs and switches up to the same level as the new tile backsplash. Replace the covers on the outlets and switches.
Ending thoughts on how to install kitchen backsplash on drywall
The backsplash installation is not that difficult. With good prep work and material estimates, it will be rather easy to install a kitchen backsplash on drywall. Learning how to install kitchen backsplash on drywall may help you improve the appearance and value of your house in a matter of days or weeks.
Installing backsplash tiling in your kitchen is also an excellent do-it-yourself project for homeowners who want to get their hands dirty and acquire new skills around the house. Install a new backsplash in your kitchen to update the aesthetic of your home.
If you enjoyed reading this article about how to install kitchen backsplash on drywall, we also wrote about subjects like how to paint pressed wood kitchen cabinets, how to disguise kitchen soffits, how to organize a corner kitchen cabinet, and how to brighten a dark kitchen.
That is not all. We have other kitchen-related articles on how to organize deep kitchen cabinets, how much it costs to install a kitchen faucet, how to whitewash travertine, how to make a kitchen island with IKEA cabinets, how to sharpen kitchen shears, and how to organize kitchen utensils.