Advertisement
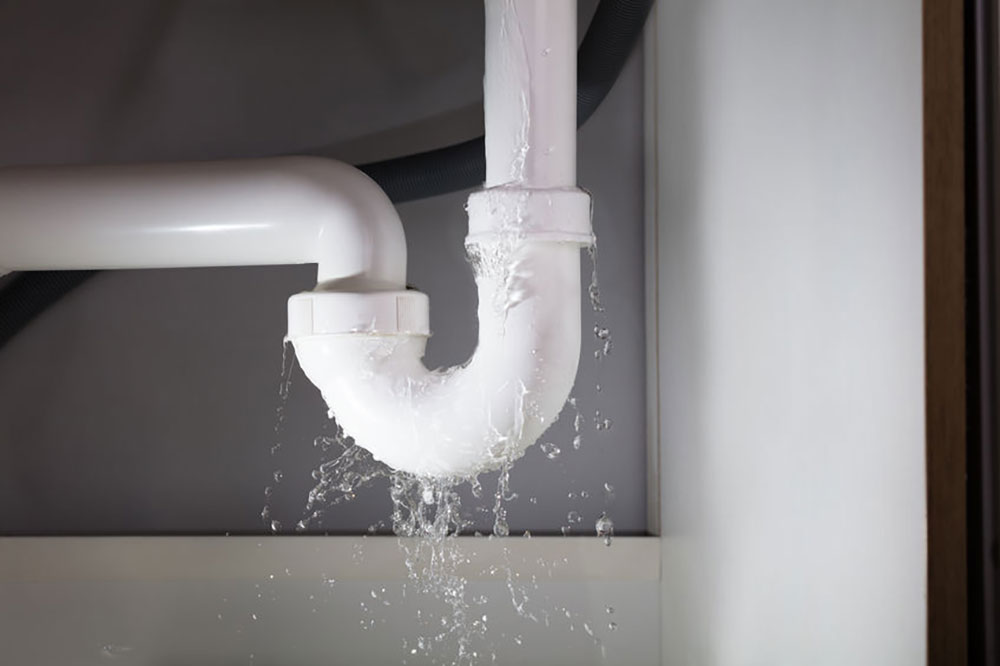
If you discover a musty odor and moist areas in your kitchen sink cabinet, act immediately to avoid more damage. Typically, the source of this problem is a leaky kitchen sink drain. Rapid action facilitates mending.
It just takes a little time and a few basic equipment to resolve the problem and prevent water damage to your kitchen cabinets.
Allow us, with this article and tutorial, to demonstrate to you how to remove the kitchen sink drain.
Why Is Your Kitchen Sink Drain Leaking?
Before doing the actually work, first inspect what is the problem. When learning how to remove the kitchen sink drain or any repairing around the house, you must have a clear picture what is causing the issue.
However, you must first determine the source of the leaking water and ensure that the problem is really with the kitchen sink strainer and not with something more severe, such as a leaky pipe. If the leak originates at the joint where the sink and drain meet, the problem is a malfunctioning old kitchen sink strainer.
Regrettably, there is no universal explanation for why sinks leak. Rather than that, you will need to investigate a variety of issues.
The following are some common reasons of sink leaks:
- A ruptured seal: If the plumber’s putty that surrounds a joint is too thin, water pours through.
- The putty dries and deteriorates: It takes a long time, but putty dries and deteriorates with age. As a result, it becomes brittle and incapable of expanding and contracting normally. Cracks begin to appear, and fragments fall off.
- The drain becomes inoperable: While stainless steel drains are very robust, they are not resistant to corrosion. Occasionally, a new drain or sink basket is required.
How to Remove A Sink Drain
Before you begin, carefully read each step and gather the equipment necessary for your sink.
Determine the Type of Sink Strainer You Have
The strainer on a kitchen sink acts as a watertight link between the sink and drain pipe, as well as a food trap that prevents the drain from clogging. Inspect the sink opening.
Typical strainers include the following:
- Locknut strainer – These strainers include a big ring-type locknut that threads directly into the strainer housing and is pressed against the bottom of the sink by a friction washer and rubber washer.
- Locknut strainer with screw attachments – Certain strainers include a locknut with screws drilled into the locknut’s bottom. Three or four screws in the corners hold the plate to the sink.
- Bell washer strainer – These strainers have a huge cup-shaped metal bell washer that fits over the strainer’s bottom and pushes against a rubber washer attached to the sink’s bottom.
Shut Off Water Supply
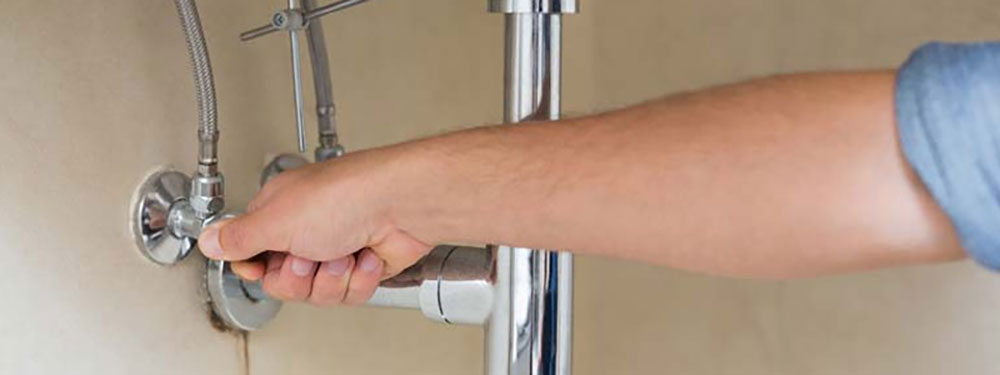
When planning how to remove the kitchen sink drain and in any plumbing project, this is the step you must not skip in any way.
Arrange an old towel or rag on the floor beforehand to collect any spilled water. Install a small tray or box to properly store washers or screws that you remove.
To turn off the hot and cold water supplies to the kitchen sink faucet, go for the shut-off valves located in the sink cabinet.
This step may be unnecessary if the section of the sink you’re working on does not have any water supply tubes. However, a newbie in plumbing should get used to shutting off shut-off valves.
This precaution will guarantee that you do not ruin your work if you accidentally switch on the water faucet, which is particularly important if you have installed a touchless kitchen faucet.
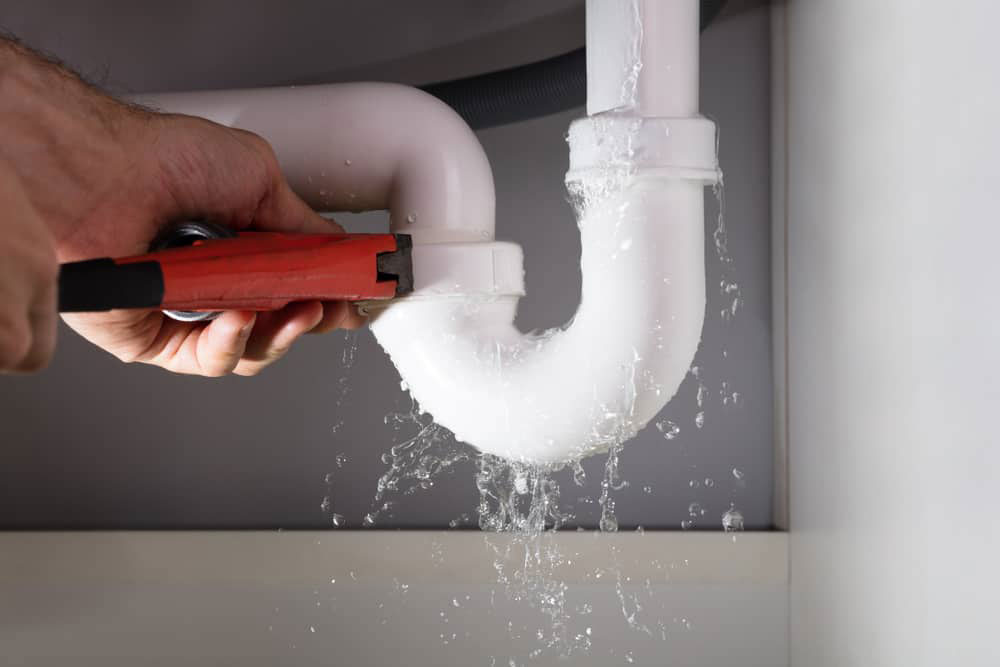
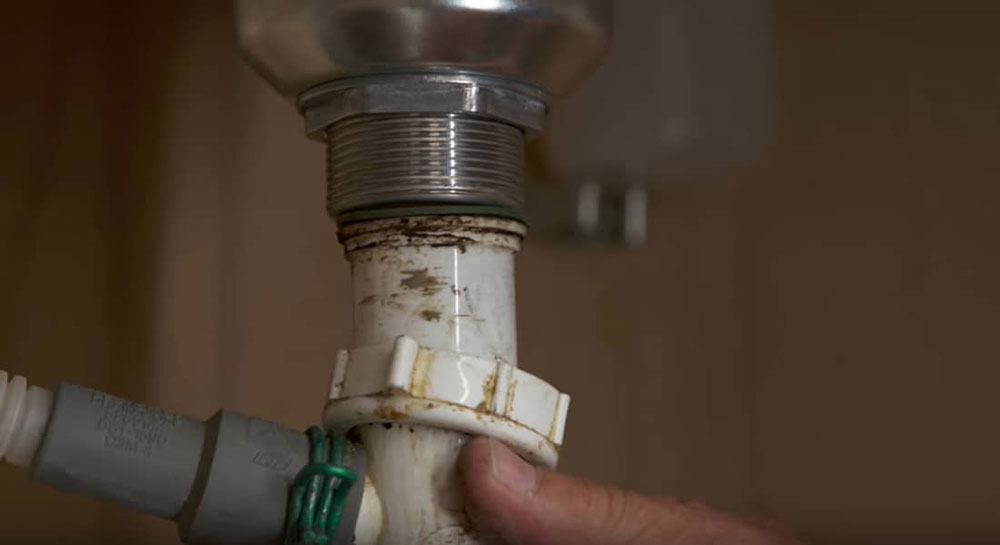
Loosen the Coupling Nut That Connects the Strainer to the Drain Pipe
While kitchen sink strainers are always made of metal, the drain pipes in the majority of contemporary houses are constructed of white PVC. Under your sink, you’ll discover a PVC or metal connection nut connecting these two components. Separate them by loosening this nut.
By rotating a PVC nut counterclockwise, you should be able to loosen it by hand. Wrap a cloth around the nut to aid in gripping it. Additionally, a pipe wrench or big adjustable wrench may be required to tighten a metal nut.
If desired, you may also disconnect the drain pipe at the top of the trap (the U-shaped curve) to provide more working space.
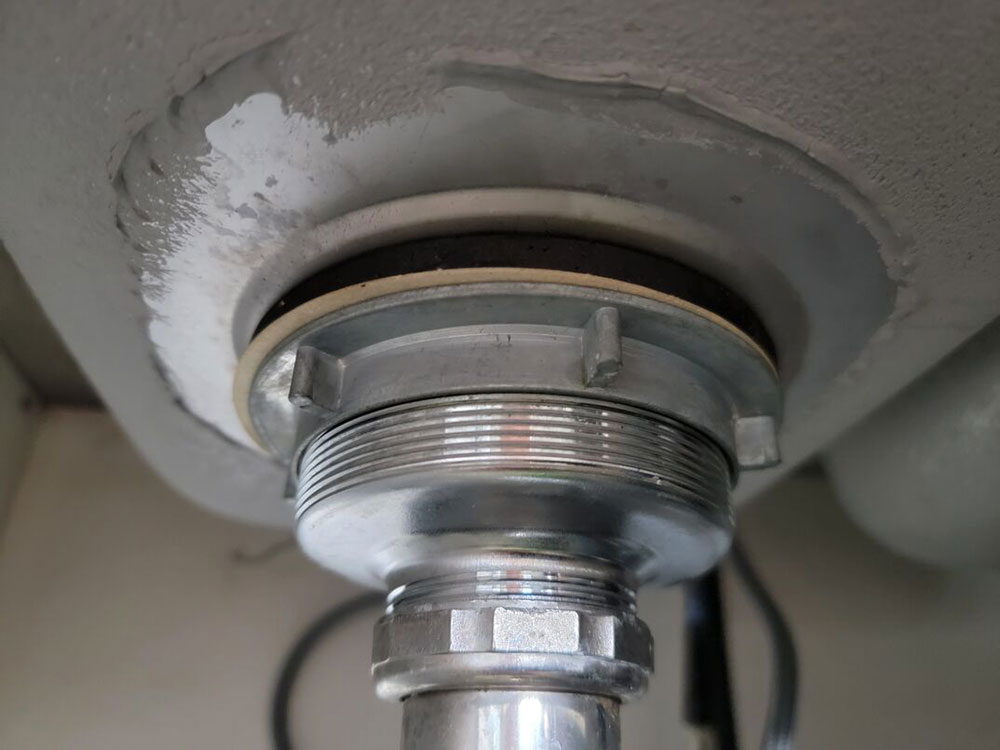
If you see threads surrounding the strainer’s widest area (where it attaches to the sink), you have a locknut strainer. If three or four screwheads are also visible against the locknut, these must be removed prior to loosening and removing the locknut and strainer. A standard screwdriver (usually with a Phillips head) will suffice.
After removing the screws, you should be able to manually release this sort of locknut. Counterclockwise turn it until it disengages from the threads and glides down from the strainer.
Unscrew the kitchen sink strainer locknut using 16-inch slip-joint pliers or a spud wrench. If the whole basket rotates, put the handles of pliers into the strainer grate from above and secure it with a screwdriver.
Loosen and remove the nut at the bottom of a bell washer strainer
With the same pipe wrench used to remove the strainer’s nut to the drain pipe, loosen the same-sized nut that presses up against the bell-shaped housing. Remove the nut from the threads and out of the way, and then lower and remove the bell housing from the strainer.
If the bell housing will not readily come away, press a flat head screwdriver into the gasket wedged between the bell and the sink’s bottom. Pry the bell housing apart and remove it.
Remove the Drainpipe

Reach over the front of the sink with the screwdriver, or have an assistance hold it from above. If you can maneuver the drainpipe out of the way, you may put the pliers handles from the bottom into the kitchen sink strainer grate to get a stronger grip on it.
If all else fails, encase the locknut in a metal cutoff wheel and cut it with a rotary cutter. Cut till the cardboard ring above the nut is reached. Avoid cutting into the sink. If the nut continues to refuse to rotate, insert your chisel into the cut area and bash it open with a hammer. Protect your eyes with eye protection.
Remove the Sink Drain
Once the plate, nut, or fixture has been loosened, spin the basket strainer. If the fitting and basket strainer gate remain still, shake them slightly. With a chisel or pliers, chip away any resistant little fragments.
If it remains immobile, softly pound the bottom with a mallet to help remove kitchen sink drain. Precautions should be taken to avoid causing damage to the sink drain.
Once the sink drain becomes free, jiggle it around until you can completely remove a kitchen sink. Scrape away any plumber’s old putty from around the sink drain hole using a plastic knife.
Note: Avoid scratching the stainless-steel surface by using plastic. Scratches enable dirt and moisture to build, accelerating the metal’s degradation.
That concludes part one of the kitchen sink drain removal.
What If the Connections Are Rusted Together?
Occasionally, the nut or screw is completely corroded. Because removing them is not straightforward, now may be the time to see a specialist.
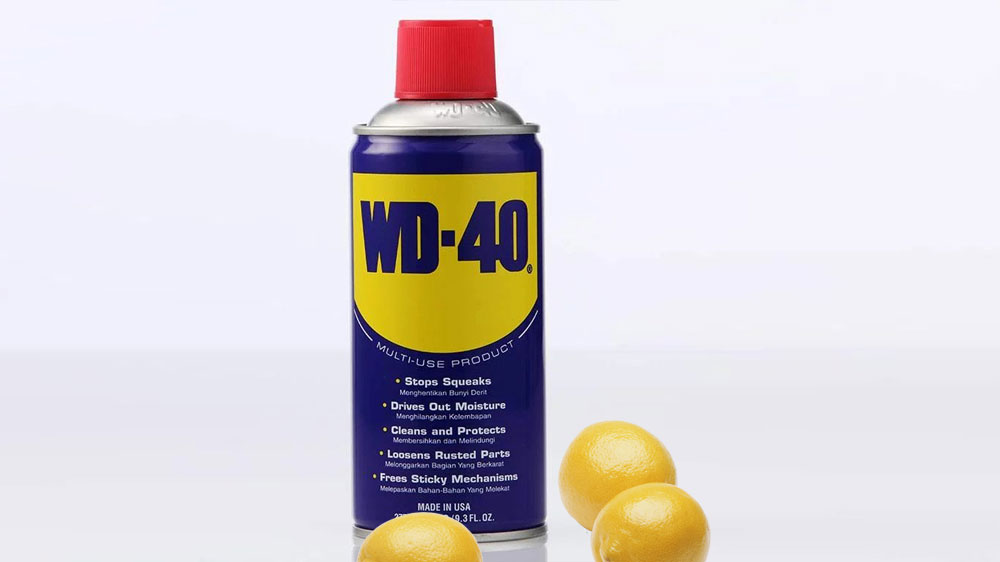
If you’d rather be your own sink plumbing kitchen hero, use caution. Begin by liberally using WD40, cola, or lemon juice. While cola or lemon juice may seem like strange alternatives, both dissolve rust and may be used in a hurry.
Allow five minutes for the liquid to completely permeate everything. Retighten the nut or screw. If you are unable to do so, apply more liquid and wait a bit longer.
If the nut still refuses to move with pliers or a wrench after this, you’ll need to try another method. You may even have to cut through the metal and then chisel away the residue in this situation.
A rotary multi-tool, when used in conjunction with the appropriate blade, will cut straight through the nut. Additionally, you risk slicing the drain or nicking the pipe, so proceed cautiously.
Clean the Hole left by the Old Drain Strainer
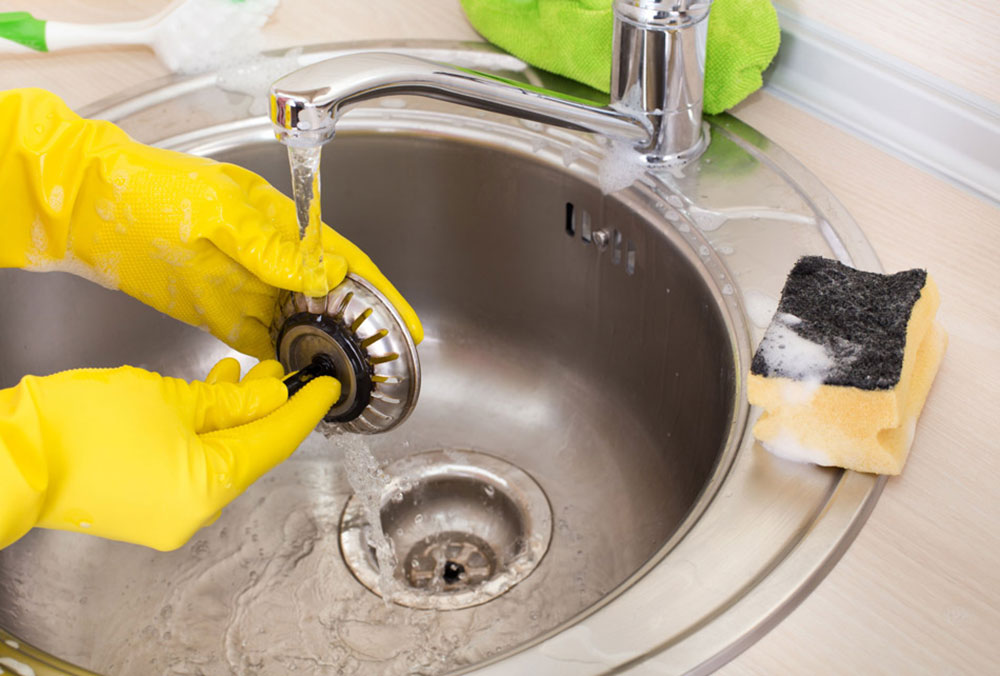
Expect the hole created by the drain sink strainer to be unclean as a result of fragments of dried plumber’s putty and some muck. Scrape away the plumber’s putty using a plastic putty knife and thoroughly clean and dry the hole to prepare for the new basket sink strainer.
Conclusions on how to remove the kitchen sink drain
A leaky kitchen sink drain is not something you can put up with for an extended period of time. You may attempt, but you will quickly weary of retrieving bowls of water from under your sink. This tutorial will walk you through the process of removing your leaking sink drain and replacing it with a more effective one.
We’d want to hear how beneficial this plumbing tutorial was for you. Send us your questions and don’t forget to share this article and subscribe to our newsletter to get updates on our other do-it-yourself tips.
We hope this article about how to remove the kitchen sink drain was helpful and educating.
If you enjoyed reading this article about how to remove kitchen sink drain, we also wrote about subjects like how to fix a leaky kitchen faucet, kitchen color schemes with white cabinets, kitchen color schemes with wood cabinets, kitchen color schemes with grey floors, how to install kitchen backsplash on drywall, what backsplash goes with granite countertops, or what backsplash goes with white cabinets.