Advertisement
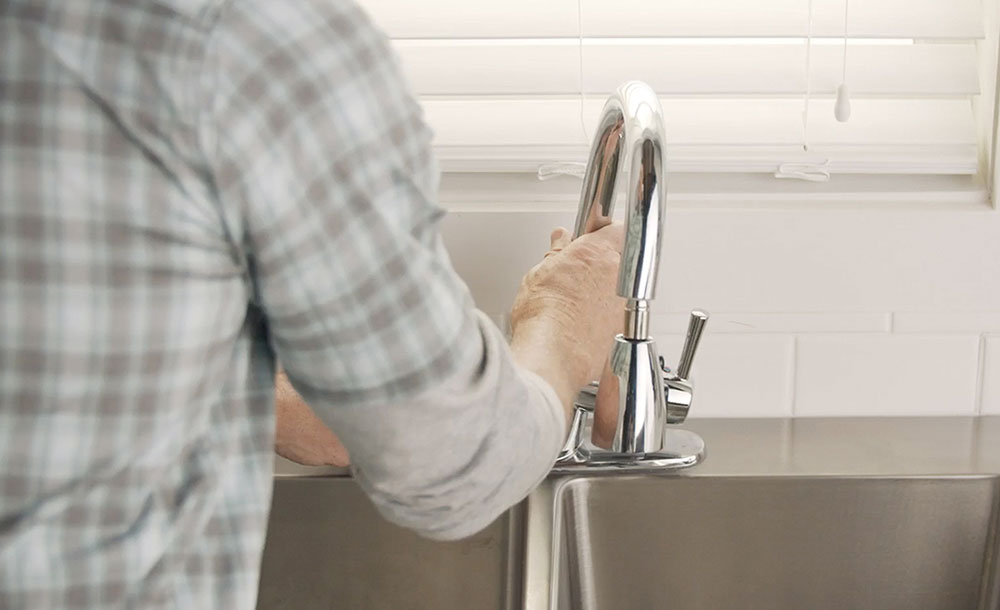
Is your kitchen faucet old? Do you want to install a new kitchen faucet? Then this article is for you as we will explain how to remove an old kitchen faucet.
Removing a kitchen faucet is the first step in replacing it with a new one, and it may be a simple and straightforward procedure—or it can be quite hard in certain circumstances. In any case, being prepared may make removing a kitchen faucet much simpler and less irritating.
Whether you’re replacing a kitchen faucet or reusing one for a new kitchen sink, this step-by-step tutorial will walk you through the process.
Critical Steps Before Replacing a Kitchen Faucet
There are some crucial steps to take when considering how to remove an old kitchen faucet.
Understand the location of your main water shut-off valve and how to cut it off in an emergency. Ascertain that everyone else in your household is aware as well.
If the stop valves on your faucets fail or become inoperable, you must instantly shut off the water at this main water shut-off valve.
Inspect the dedicated stop valves on your kitchen faucet (also known as shut-off valves). They are typically metal knobs that protrude a few inches from the interior of the cabinet.
These stop valves are crucial because they allow you to cut off the water to only that kitchen faucet (or other water fixture) without shutting off the whole building’s main water supply. Therefore, if the stop valves are old, they must be replaced before to removing the old kitchen faucet. Add them to your shopping list if they need to be replaced.
If your kitchen countertop is made of natural stone, use WD40 or any oil-based lubricant with caution. Bear in mind that while attempting to dislodge rusty and gummed-up nuts and screws, use caution when using WD40. These compounds will discolor these natural surfaces indefinitely.
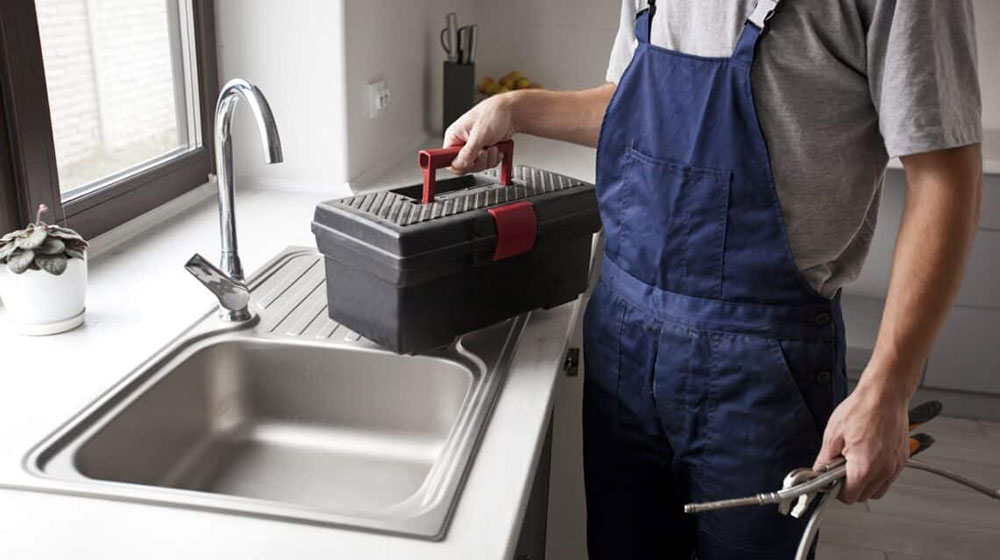
Tools and Supplies for Removing a Kitchen Faucet
To remove a kitchen faucet body, two tools are required: a basin wrench and an adjustable wrench. Utilize the adjustable wrench to provide the necessary leverage. Disconnect the water supply lines by unscrewing the nuts.
The basin wrench is ergonomically built for use in small places. You’ll use it to undo the several nuts necessary in removing a kitchen faucet body.
A screwdriver and a utility knife or putty knife may also be necessary to remove any old caulk from around the kitchen faucet body. Additionally, it’s a good idea to have work gloves, penetrating oil, a plastic pail, and paper towels on hand.
The Removal Process
Prior to beginning the removal procedure, you may choose to buy the replacement so that it is readily available for fast installation. Being without a kitchen faucet is inconvenient at best, so it helps to be prepared to go on to the next stage after the kitchen faucet has been removed.
Spray with penetrating oil
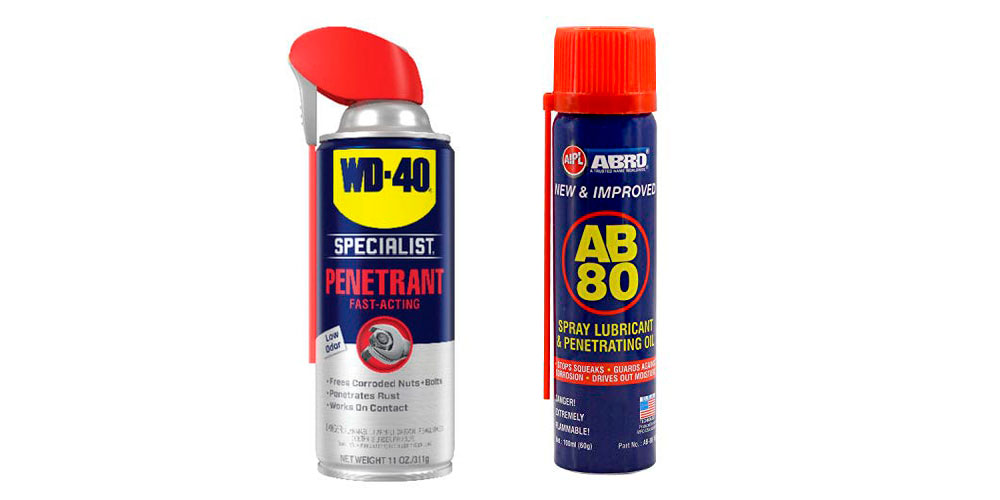
Sweating pipes and high humidity levels inside a cabinet have a tendency to cause objects to stick. With your safety glasses on, apply penetrating oil in the following areas:
- Supply lines at both ends (at the shut-off valves and at the kitchen faucet)
- Both sprayer hose ends
- The oversized nuts that secure the kitchen faucet to the kitchen sink
Turn Off the Water
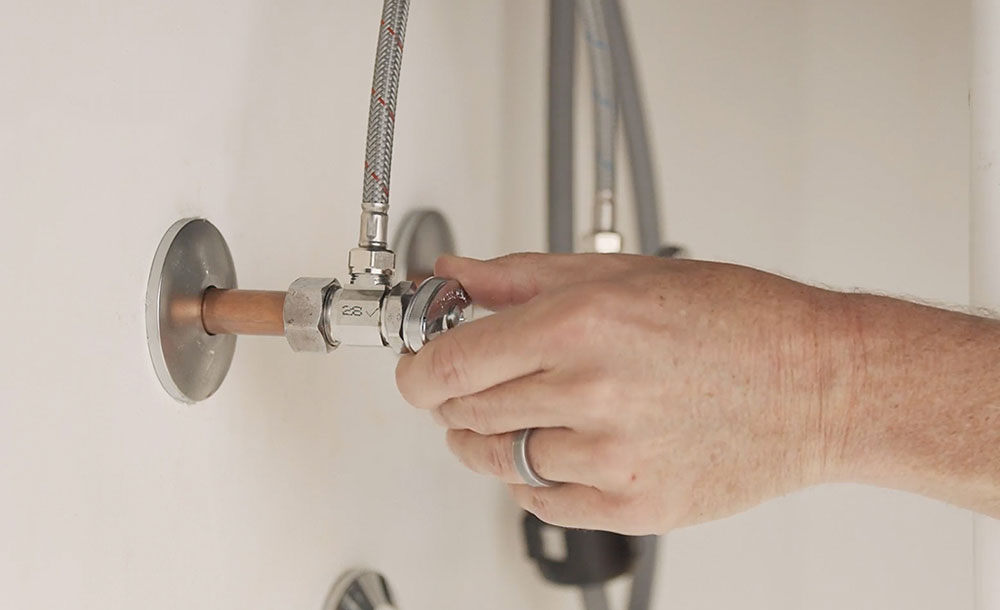
Always switch off the water before upgrading or repairing a faulty faucet. This will simplify and clean up the process of removing a kitchen faucet.
Underneath the kitchen sink, locate the shut-off valves. They should be firmly positioned in the “Off” position.
If there are no water shut-off valves under the kitchen sink, you’ll need to cut off your home’s main water supply. This primary shut-off valve for the water supply is often positioned in a basement or garage.
After turning off the water, completely open the kitchen faucet. This will drain any remaining water in the lines. Drain your kitchen faucet sprayer as well.
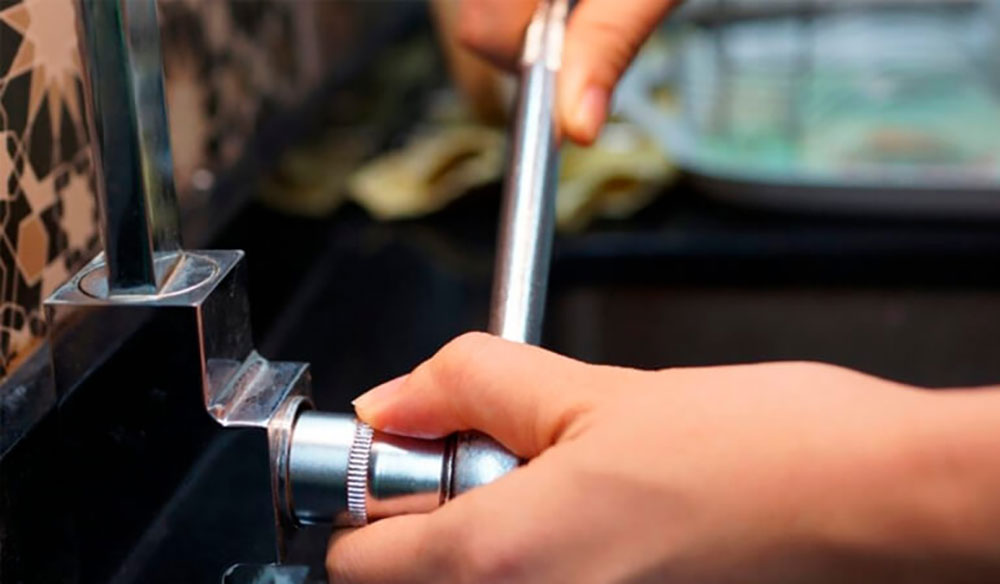
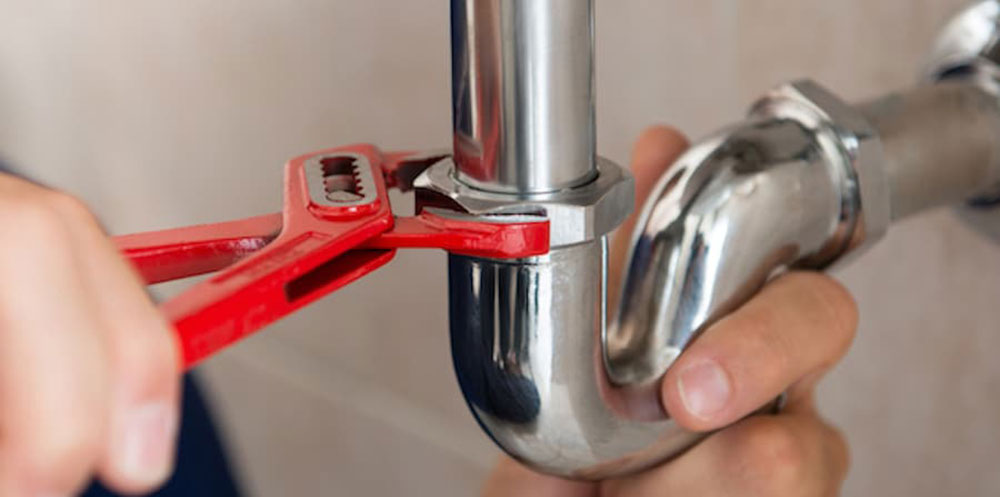
Remove Supply Lines
To remove the old faucet, unplug it from the water shut-off valves. Unless these hoses are quite fresh, you should probably replace them. To remove the brass nuts from the valve, twist them counterclockwise with your 6-inch adjustable wrench.
When working with older shut-off valves or pipes, it’s often a good idea to support the valve using your hand or a set of tongue-and-groove pliers. This prevents you from applying excessive torque to weaker pipes. Additionally, if the braided hoses are twisting and preventing the brass nuts from being removed, you may grab the hose with the pliers and twist the nut with the wrench.
Remove the Drain Lines from the Faucet
Acquire a pipe wrench or slip-joint pliers if you need to remove drain lines to gain access to the old faucet. Purchase a standard tubing cutter for cutting copper tubes. However, if your copper supply lines are located within a few inches of the cabinet’s rear, you need purchase a special tiny tube cutter. Additionally, you’ll want a set of open-end wrenches for removing and reconnecting the water lines.
Prior to disconnecting the drain lines, take a photograph or sketch the layout to assist you in reassembling everything.
Disconnect the garbage disposer
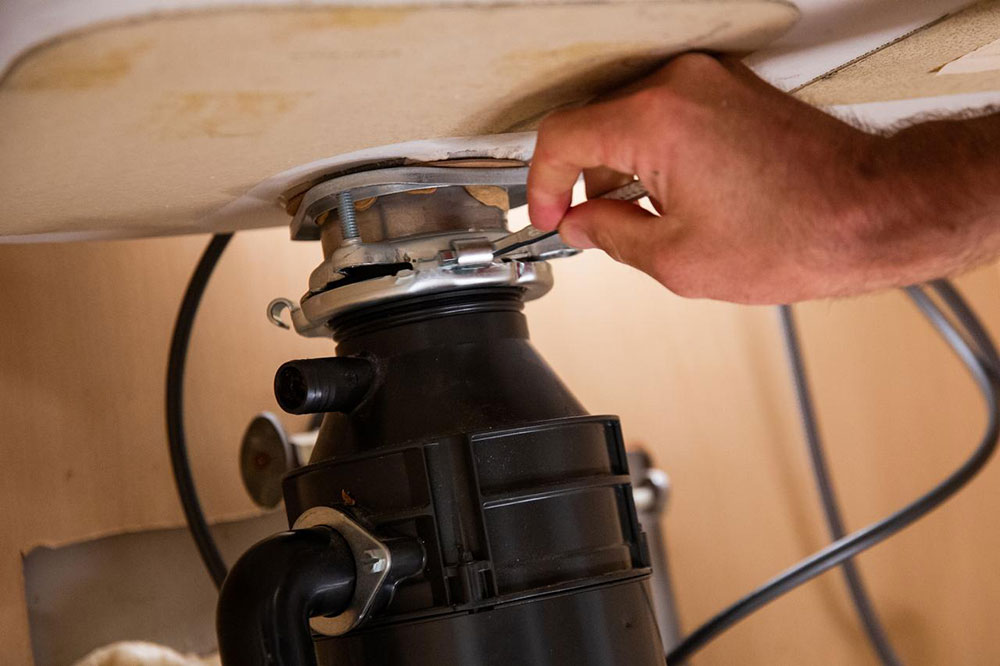
Unplug the waste disposer or, if the disposer is directly connected, turn off the circuit breaker in the main service panel. Disconnect the dishwasher’s discharge line and position a 1-gallon paint can underneath the trash disposer, above which should be some rags to cushion the disposer if it falls loose. Remove the disposer by tapping the retaining ring in a counterclockwise motion with a hammer.
Occasionally, a waste disposer may become a 20-pound impediment. Do not be discouraged—it is simpler than you think to remove it and then replace it after the faucet is installed (Photo 2).
Unplug it and slide it out of the cabinet to make room for it. If the disposer is hardwired, turn off the circuit breaker that controls it, remove it from the kitchen sink, and store it within the cabinet with the electrical cord still connected.
Disconnect the Sprayer
If your kitchen faucet has a spray attachment, you’ll also need to detach it. Hoses are often fitted with quick-connect connections that snap into a fitting under the faucet. Simply squeeze the hose fitting together until it separates from the faucet.
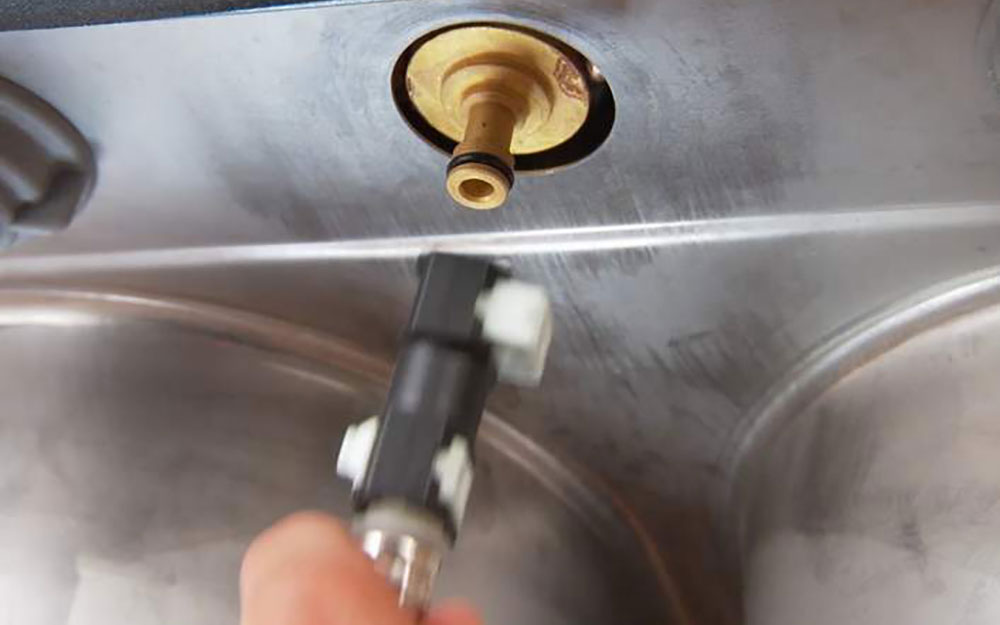
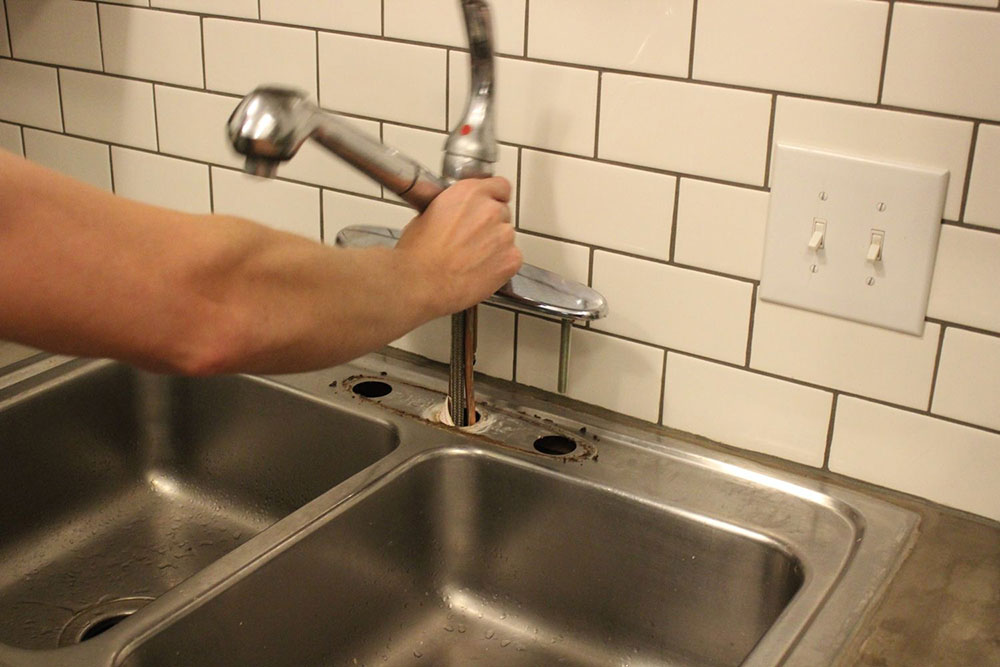
Remove Mounting Nuts or Screws
Disconnect the mounting bolts that secure the old faucet to the kitchen sink. These are screwed onto the faucet tailpiece, which is placed high above the sink and behind the basins.
Depending on the type of faucet, there may be two or simply one of these mounting bolts. Reaching these nuts might be challenging because of their confined placement between the back of the kitchen sink and the base cabinet’s wall. A specialized tool known as a basin wrench may assist in loosening the mounting bolts.
Occasionally, despite your best efforts, it is difficult to unscrew the old faucet nuts. Take a deep breath! Soak the threads in penetrating oil and retry. If that does not work, it is necessary to pull out all the stops and remove the kitchen sink in order to access the nuts. It’s not difficult to do.
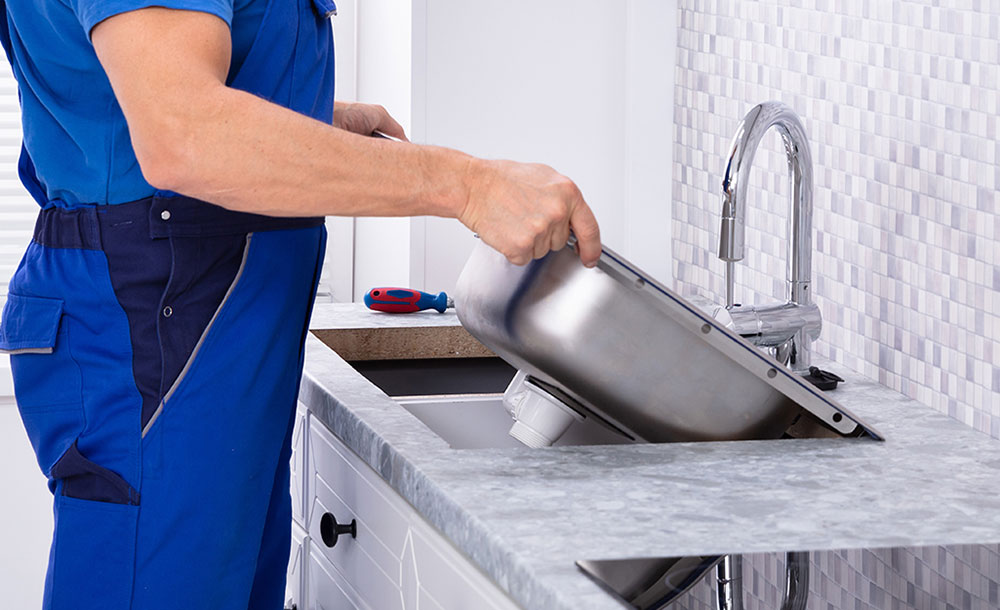
Loosen the screws on the bottom of the sink rim to remove a clamp-down kitchen sink, or use a tool knife to cut the caulk between the drop-in sink and countertop and take out the sink. Then, using locking pliers or a pipe wrench, attack those nuts to release the old faucet body.
Remove the Faucet
After removing the bolts that secure the faucet to the sink, you may remove the old faucet. Take every effort to prevent the countertop from cracking or chipping.
Pull the whole old faucet body straight up gently. If it is stuck, slowly pry it free using the edge of a plastic putty knife. After removing the sink, use the putty knife to remove any remaining plumbers’ putty or caulk from the surface. Avoid scratching the sink.
Tip: You may need to disassemble the old faucet components prior to removing it. To remove a single-handle faucet, for example, detach the handle from the main valve. Always refer to the manufacturer’s handbook for detailed instructions on how to remove an old faucet.
Remove Kitchen Faucet Residue
When you remove the old faucet after repeated usage, it typically leaves some muck and sludge behind. While the majority of them wipe clean, a dab of vinegar on a towel generally removes the most tenacious residue.
If there are stains from hard water, soak the cloth in vinegar and place it directly on the stain for 10 minutes before cleaning it away. Rep this method until the stain is completely removed.
More Tips on Removing a Kitchen Faucet
Certain faucets that have been in use for an extended length of time may seem unremovable. Corrosion or mineral deposits may cause nuts and bolts to freeze. There are various options for resolving the matter.
To begin, liberally coat stuck nuts, valve handles, and screws with penetrating oil. The more time you let it to absorb, the better. If penetrating oil does not work, the following are some more options to consider:
- Directly heat the nut or screw. Heat may cause the metal to expand enough to turn.
- Gently tap the nut with a hammer to compel it to spin.
- If the stuck nut or bolt is coated in mineral deposits, use white vinegar and a wire brush to remove them.
- Cut the bolt or screw using a hacksaw.
Understanding how to remove a kitchen faucet is a straightforward do-it-yourself chore that almost anybody can do. All you’ll need are the proper tools and a little bit of time. Continue with the procedures above and refer to the manufacturer’s directions for your specific kitchen sink faucet.
Numerous examples may be found online. Consider recycling your old faucet rather than throwing it in the garbage.
Extra tips
When you buy most faucets, only three of the four holes are covered. You’ll either need to get a blank insert or use the extra hole to put a liquid soap dispenser or hot water dispenser in there. To do the installation while you’re under the sink with everything torn apart, plan to do it now. This article will tell you how to fix a leaky faucet if you have one.
It’s always better to install the faucet first, then put your new kitchen sink in the counter.
How to Take Out a Kitchen Sink Tip#1
When replacing your faucet, plan to do it during store hours. This is a good idea. Most of the time, you’ll need more than one thing for this how to replace a kitchen faucet project.
How to Take Out a Kitchen Sink Tip#2
Putting a piece of plywood on some 1-gallon paint cans in front of the cabinet is a good idea. When you do this project, you’ll be a lot more comfortable lying down under the sink. Otherwise, the edge of the cabinet would be piercing your back, so you would not be able to move.
Shut it off
Make sure, to double-check even, you turn off the main water supply valve. This is very important as you don’t want hot and cold water flooding your kitchen.
Conclusions
Let’s summarize some things. First of all, make a list of all the materials required for this kitchen faucet project replacement.
Materials
Preparing all of your items ahead of time for this will save you time and money by avoiding last-minute shopping trips. Here’s a list of things to do.
- Sandpaper with a 150-grit rating
- Stainless steel supply tubes that are braided
- A new faucet has been installed.
- P-trap
- Valves that shut off the flow of water
This all can easily be equipped from the local home improvement stores. Also, you will need some tools to get the job done.
Tools needed
You’ll save time and aggravation by gathering all of the required supplies before you begin this do-it-yourself kitchen faucet replacement job.
- It’s a 4-in-1 tool
- a ratcheting wrench
- Hammer
- Handsaw
- a pipe wrench
- Pliers with a slip-joint joint
- Tool for cutting tubing
- a wrench
After you’ve prepared everything necessary, consult this “How to remove an old kitchen faucet” and follow all the advice, tips, and steps with patience and we are sure you will do amazing work. And if you still don’t feel confident enough to do this on your own, please consider hiring a licensed plumber.
Instaling a replacement faucet maybe seems easy and it can be, but it is serious plumbing work, and replacing and installing any replacement parts in the plumbing area should be done with cause. We hope this article about how to remove an old kitchen faucet to help you make a good decision.
If you enjoyed reading this article about how to remove an old kitchen faucet, you should check out this one on how to organize a small kitchen without a pantry or this one on how to remove the kitchen sink drain.
We also wrote about similar topics like how to remove a Moen kitchen faucet, how long it takes to remodel a kitchen, how to measure a kitchen sink, how to clean kitchen faucet head, how to adjust kitchen cabinet doors, how tall are kitchen counters, and how to restain kitchen cabinets without stripping.